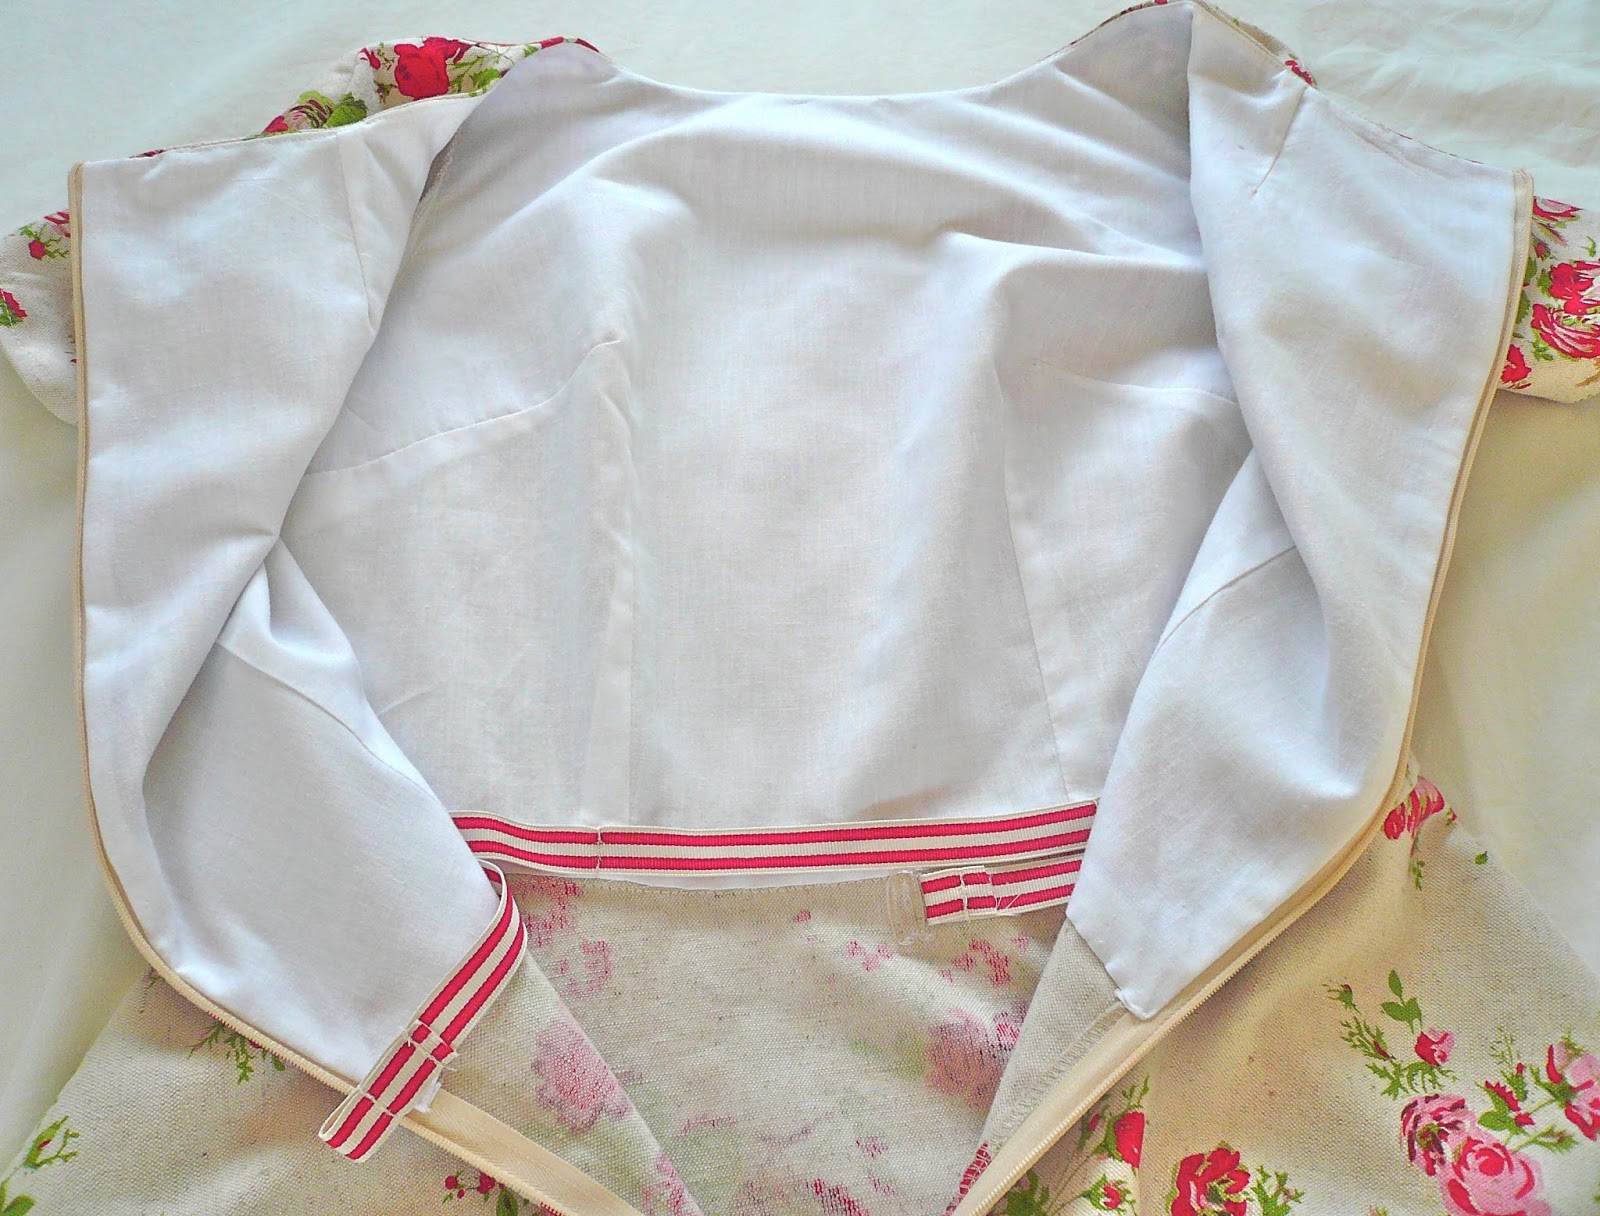
Today I want to show you how I made the waist stay for my
Emery dress. There are many reasons for adding a waist stay: they can stabilise the waist seam and prevent it from stretching, they can support the weight of a full and/or heavy skirt and reduce strain on the zip. They're also there to ensure your garment 'stays' (there's a clue in the name!) in the correct position. Unlike your garment, there is no ease in a waist stay, it's designed to allow the wearer to move around comfortably whilst anchoring the waist in position and preventing the dress from riding up or down.
After a fair bit of research, I came to the conclusion that there are two methods for attaching a waist stay to a dress. The first way is to machine stitch the ribbon or stay to the waistband seam which supports the weight of a full skirt (see the
Sewaholic tutorial for this method). The second way is to tack it to the lining (or seams if your dress is unlined) at regular intervals, which is the method described on the
Gorgeous Fabrics blog. I've taken elements from each one to make it work for my particular garment, but would like to give both tutorials the credit they deserve for showing me how it's done!
I chose to use the second method of tacking the waist stay to the seams of the dress. This seems like the easiest method for the Emery dress as the bodice is fully lined. It's simple to make too, barely taking me half an hour from start to finish.
You will need
A length of grosgrain or Petersham ribbon ⅝"to 1"wide, whatever width is most comfortable for you. I can't remember where my ribbon came from (probably to tie up a fabric purchase) but happily, it's the exact colours of my dress.
The ribbon should measure the exact length of your waist plus at least 6" for fiddling about with.
A set of waistband hooks and eyes. My preference was the kind of hook used on a bra or swimsuit.
1. Fold your ribbon in half and mark it with a pin. Pin this to the centre of the waistline on your dress, (usually equidistant between the front bodice darts if you have them.)
2. Continue pinning the ribbon to the waistline seams and darts. Pin it to the zip openings as well, just to hold it in place.
3. Now hand tack the ribbon to the seams/darts, backstitching a few times for security. I attached mine to both front and back darts for extra anchorage. Don't tack it to the zip as you need the few inches around the opening to float free.
4. Make a loop at one end of the grosgrain ribbon, thread your hook through and pin.
5. At the other end, make a loop with your ribbon and pin.
6. You now need to try the dress on and adjust the pins so that the waist stay fits securely around your waist. I used Tasia's recommendation of trying the dress on back to front - it works!
7. If, like me, you find you have a very different waist measurement pre- and post-lunch, then you may wish to add an extra hook/row of stitches for this eventuality. This genius idea came from Claire at
Sew, Incidentally (is there anything that woman doesn't know?!) Simply add add two rows of stitches instead of one: the one furthest away from the end is for your actual waist measurement and the one nearer the end is the looser fitting one to accommodate your stomach after lunch. Here's Claire's diagram which explains it perfectly.
As a dedicated eater of pies, I went for the two loop option. You may need to fiddle with your pins to get them in the right positions, just make sure that your actual waist measurement is the pin furthest from the end.
8. The final stage is to simply stitch where your pins where to create the loops for hooking. Make sure you backstitch a few times to keep them secure.
And there you have it, a waist stay! Now you can go dancing, eat pies, or do both at once and your dress will stay securely anchored at the waist.
 |
| Angie modelling the waist stay on the Emery dress |
I hope you found this tutorial helpful and as always, please let me know if there's anything that isn't clear. x


