Today, I'm going to share my tutorial for adding a lace trim to a Peter Pan collar. I worked out how to do this whilst making my
Alma blouse for the
Watch this Lace challenge. Although there was a lot of initial head scratching as I tried to work out what went where, it's actually pretty straightforward. Sharing this tutorial is part of
Sew Grateful Week, hosted by Debi at
My Happy Sewing Place.
There's barely a day goes by when I don't look up an online tutorial or try to find the answer to a sewing conundrum. And there's ALWAYS a solution that works for me on a sewing blog somewhere! I'm eternally grateful to the online sewing community for this generous sharing of knowledge, so this tutorial is my little way of giving something back.
You'll need to start with a pattern for a Peter Pan style collar. I'm using the
Sewaholic Alma pattern which has separate front and back collar pieces (some patterns may have the collar as one piece.) Follow the pattern instructions for the very first stages of making your collar. In my case, this comprised cutting out the pattern pieces, transferring markings, fusing interfacing to the collar pieces and sewing the front and back collar pieces together. We're going to start the tutorial from this point, so make sure you've done all your prep work beforehand.
You will need:
Prepared pieces of your preferred collar pattern (see above).
1 to 1.5 metres of lace trim depending on the size of your collar. My collar required almost exactly a metre, but it's always worth buying more than you need for contingency.
1. First you're going to measure the width of our lace trimming. Mine is 6/8ths of an inch at the highest point.
2. Then you need to decide how much of the lace trim you want to peep out along the edge of the collar. I decided I just wanted the top scalloped layer to show. Measure this distance - mine was 2/8ths of an inch (or a quarter of an inch if you prefer).
Now for a teeny tiny bit of maths (don't panic Captain Mainwaring, honestly it's simple!) Subtract the second measurement from the first measurement. In my case it was 6/8ths minus 2/8ths = 4/8ths (or half an inch). That's it! That's all the maths you'll need to do. And believe me, if I can work that out with my abysmal maths track record, then anybody can. So my seam allowance for when we get to step seven is half an inch. IMPORTANT point, you only need this seam allowance for step seven and NOT before.
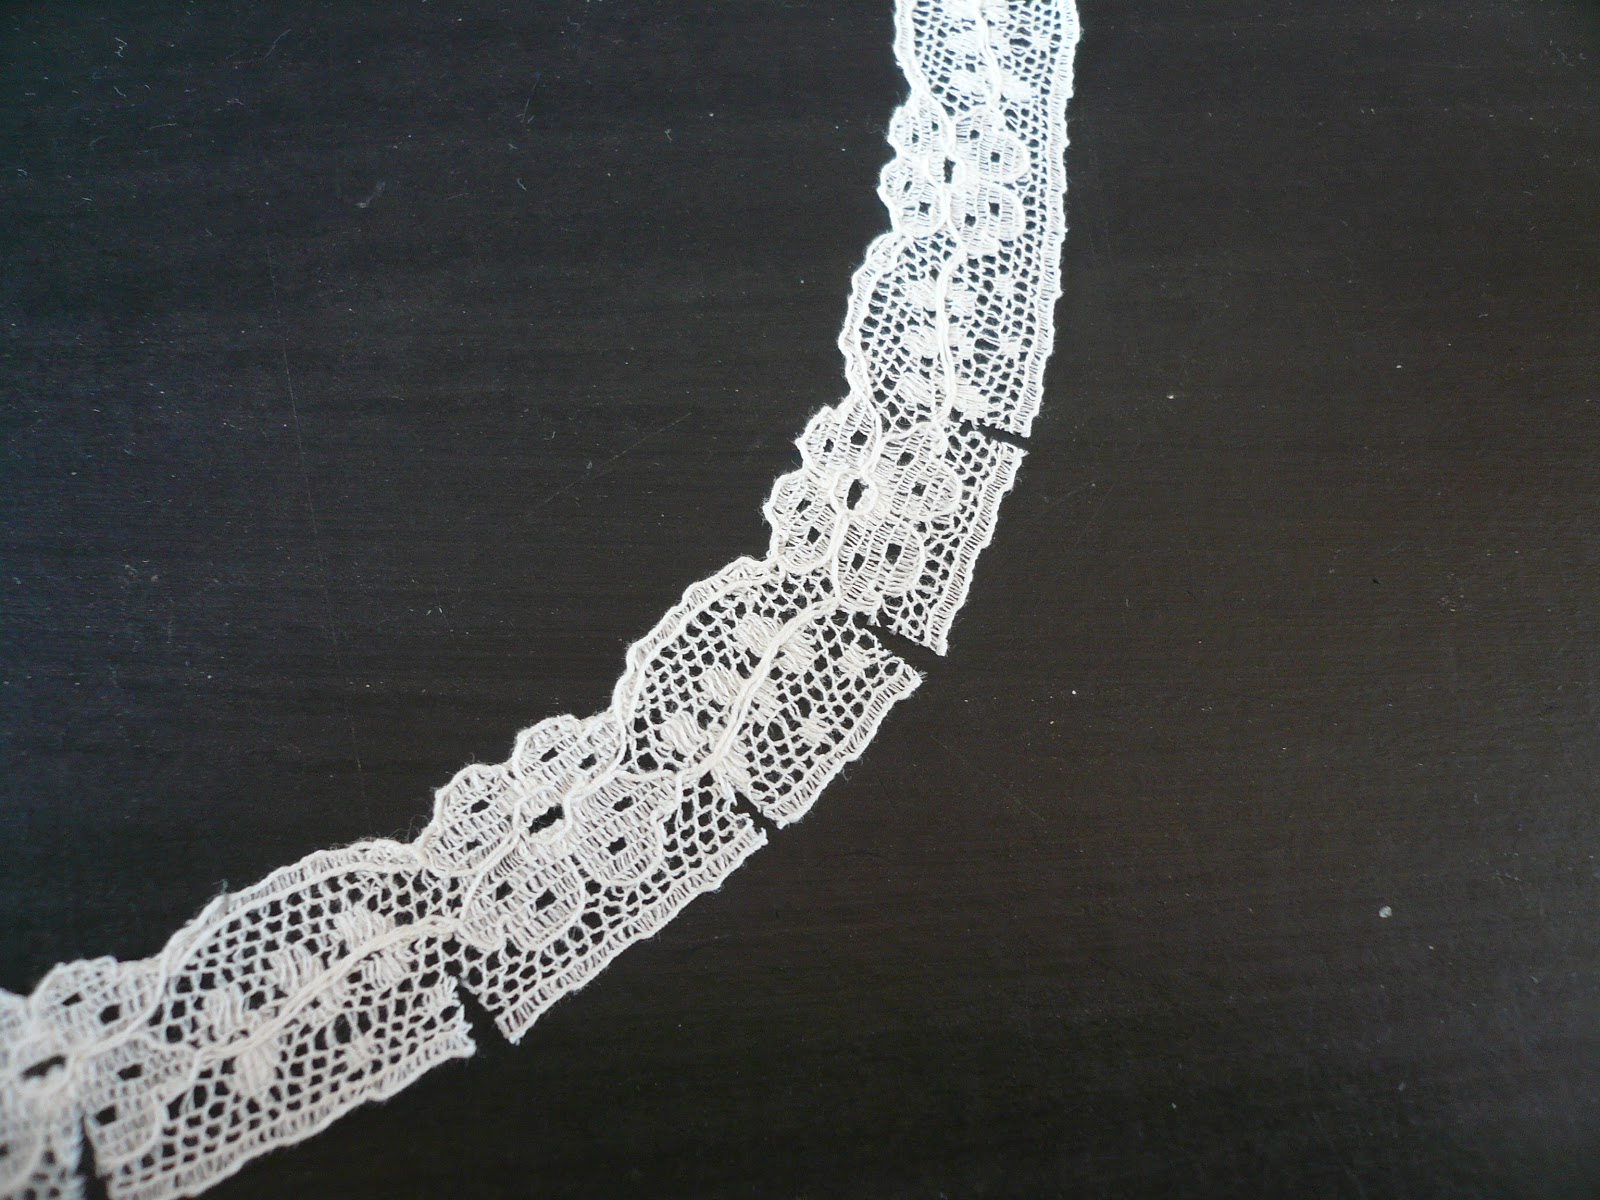
3. Right, back to the collar. Start by making tiny snips in the lace trim at half inch intervals. Do this along the entire length of your lace.
This will make the lace much more pliable when you're placing it around curves. Remember, Peter Pan collars are VERY curvy!
4. With RIGHT sides together, pin the lace trim right around the outer edge of the TOP collar, making sure that the snipped edge of the lace is flush with the edge of the collar.
Use as many pins as you need.
5. Sew the lace trimming to the collar using a small seam allowance.
I used the width of my presser foot which is about a quarter of an inch.
6. Now we're going to make a collar and lace sandwich. Place the under collar (or collar facing, depending on what your pattern calls it) RIGHT SIDES TOGETHER with the top collar that you've just attached your lace to. Pin it carefully all the way round.
7. This is the point where you need to apply the seam allowance you worked out earlier. In my case it's half an inch. Sew the two layers together, right round the edge, using the correct seam allowance.
You'll see that you now have two lines of stitching: one from when you attached the lace and the second from sewing the front and back collar pieces together.
8. Pattern instructions always tell you to notch around a collar edge for a smooth line, but I've always preferred to trim the seam allowance right down. In my experience it gives a much cleaner, angle-free line. It's entirely up to you which route you choose. If you do decide to trim the seam allowance right down, make sure you don't cut through any of the lines of stitching!
9. Now for the exciting bit! Turn the collar the right way round and press carefully, paying particular attention to the curved edges. Use a pointed object to ease out all those curves. You should end up with a lovely, lace trimmed collar like this.
You can now attach it to the rest of your garment as per your pattern instructions. Here's mine attached to my Alma blouse....
....and being worn....
I hope this tutorial is helpful. If anybody spots any glaring errors, please let me know and I'll amend the post, I want this to be as user-friendly as possible. Don't forget to check out Debi's blog
here, with links to lots of other awesome online tutorials and free patterns for Sew Grateful Week. Happy sewing. x
Edit: You could also use the principles of this tutorial to apply a ric-rac trim - thank you to Joanne from
Sew Little Time for the great suggestion!