

Showing posts with label lining. Show all posts

Friday, 20 October 2017

It's Cocktail Hour!

Today I'm sharing the dress I made as part of the Vogue Patterns Cocktail Hour Sewalong.


The sewalong was launched in March by McCall's to raise money for The Eve Appeal - a charity that funds research into gynaecological cancers. 26 sewing bloggers have been taking part in the blog tour since then, sewing up their choice of 20 specially selected Vogue evening wear patterns. Money raised from the sale of each pattern will go to the Eve Appeal, so anybody who buys one will be directly supporting the charity. You can check out what everybody else has been making by using the hashtag #sipandsew on Instagram and Twitter.

When it came to choosing my pattern, I was looking for a simple design that wouldn't require much brain power to sew. Vogue 1536 seemed to fit the bill perfectly - an elegant princess-seamed cocktail dress by American designers Tom and Linda Platt.
The pattern also comes with a strange Mel and Kim-style cropped bolero jacket, which you'll be pleased to hear I disregarded. I was only ever interested in the dress.

She's spoiling for a fight...
With such a simple design I knew that fabric choice would be key and spent a looong time making my mind up. I finally decided on an Italian wool crepe from Til the Sun goes Down for the main dress and a shantung satin from ClothSpot for the lining.


The navy colourway I used is no longer in stock unfortunately, but here's the link to another blue. The lining fabric is also sold out - sorry! The crepe by itself is quite lightweight but takes on a completely different feel with the lining added. The shantung satin adds structure and weight to the dress and it feels very luxurious to wear - exactly what you want from a cocktail dress. The wool crepe is expensive (£32 a metre) but reasonably wide, and with a bit of clever pattern placement I was able to get away with using just one metre for my dress. You'll be relieved to hear that I did actually make a muslin before cutting into such posh fabric!


I'd read in a few reviews that the dress ran large, so cut a size 12 which was one size smaller than my measurements. I used the petite shortening lines at the waist only (you can also shorten for petite sizes at the hips) as the finished length is already quite short. The only other adjustment I made was a 5/8" tuck across the back piece as the V back gaped slightly on the muslin.


There wasn't anything untoward about the pattern and the construction was relatively straight forward. The only thing that leapt out at me was the lack of instruction to stay stitch the V front and back necklines. Yes, it's an obvious step, but I really think it should have been included - these areas are both cut on the bias and the last thing you want is a stretched out neckline. I also ditched the instructions when it came to adding the lining as there was far too much hand sewing for my liking. I attached the entire lining by machine, apart from the area around the back split which I hand stitched. I also hand stitched the dress hem.

For such a simple dress I did have to spend an enormous amount of time with a steam iron and a clapper pressing the curved princess seams flat. Luckily for me, the wool crepe was a dream to manipulate and I'm really happy with how well the seams pressed. I think they're worth the extra effort.

I have to say, this is a gorgeous dress: simple, classy and a great fit. It isn't super fitted, but the subtle shaping of the princess seams really shows off your curves, which I like. It's very me and I'm glad I kept it simple when it came to choosing the pattern. Cheers!

Two seconds after this photo was taken I spilt the entire cocktail down my arm...

The pattern and a fabric allowance were kindly provided by McCall's. All views my own. 


Wednesday, 9 August 2017

Simplicity sundress mark two

Way back in 2013 I made myself a strappy sundress using Simplicity 2176. During its short life it was a great success, it was made with lovely fabric and had a cool vintage vibe. Sadly it came a cropper in the washing machine when the blue dye from the main dress seeped into the white bodice band, leaving it an unsightly shade of dishwater grey. I know, I know, I probably could have saved it by unpicking the bodice band and adding a new one, but as we all know I'm totally lazy and that was never going to happen. The dress was donated to charity and I was left one sundress short in my summer wardrobe. This year, I finally got round to sewing a replacement.


I did a bit of tinkering with the bodice for this second version. The fit on the bust on my original dress was always quite tight, which made the waistline ride up as a consequence. This time I added a one inch full bust adjustment (FBA) and lengthened the bodice by 5/8". I also added a little extra to the side seams as I find very tight waists unbearable in hot weather. Overall I think the fit on the bodice is much better - it's not actually that noticeable but I feel the benefit!

Original on left, new version on right
The skirt is from New Look 6557, the same one I used for my Fireworks dress. I love this shape of skirt (a quarter circle) in the hot weather as it's cool and airy without being too big. The only other change I made was to substitute the lapped zip for an invisible one and attach the inside bodice band to the zip by machine for a neat finish. 


The duck egg blue fabric is a lovely lightweight floral lawn that I leapt on when Freya was de-stashing at a recent meet up. There was 2m to play with, which was just enough for this dress, thanks Freya! The colour is slightly brighter in real life, more like the photo below.

Spot the felt tip marks that still need to be washed out!
Because the fabric is very light I underlined the bodice sections and cut a separate skirt lining with white silk cotton. I probably should have added a full lining to the bodice instead of underlining it as this would have concealed the notched princess seams. I also added strips of interfacing either side of the invisible zip for extra support and stay tape across the top of the bodice to prevent it stretching.


Without really intending to I seem to have put quite a lot of effort into making this dress! The irony is that there hasn't been a truly hot day in London since I finished it, so it hasn't actually been worn yet. It does look good with a cardigan though! x


Monday, 30 January 2017

Finished: Red Coat (McCall's 7058)

Get the flags out, I've finally finished my red coat! I first blogged about making a red coat back in November, having been gathering supplies to make one for a few weeks before that. As is often the case, it wasn't the main sewing of the coat that took so long, it was the final fiddly jobs (plus a break for Christmas.) It's been a frosty week in the UK so the timing couldn't be better for a warm, winter coat!


I didn't want to spam you with tons of photos and text, so for those of you who are interested there's a more in-depth post to follow, with links to all the tutorials and resources I used. I've also kept a record of how much the various materials cost me for this project, which I'll be including too. In the meantime, here's my coat in all its finished glory!


The pattern I used is McCall's 7058: a classic, princess seamed design with several different length and style options. I sewed a combination of versions B and C. Size-wise I cut a straight size 14, but shortened all the main body pieces (including sleeves) on the Petite lines throughout. This equated to two inches in total removed from each piece: one inch at bodice height and one inch at skirt height. Adjusting the pattern to the petite size also meant the pockets were in the correct position for my T-Rex arms!

Note: The fabric appears much redder than it actually is in these indoor photos because of the dreadful winter light.

I didn't make any further adjustments and the fit was more or less spot on. It's a tiny bit snug when fully buttoned up, as I didn't really allow for extra winter layers (duh), but I'm still really pleased with the fit. It has a lovely, nipped in silhouette.


The pattern instructions were clear and easy to follow and the main body of the coat came together very quickly. I only deviated from them at a couple of points: I chose not to include the back vents and I fully bagged the lining by machine rather than hand stitching the sleeve and coat hems. I'll include details of the lining tutorials I used in my next post. The lining pieces are separate and properly drafted with pleats to the centre back and hem. This makes a big difference when it comes to getting it on and off!


The main coat fabric is an Italian wool twill from Fabric Godmother (now sold out unfortunately). It was quite expensive (£26 per metre), but as it was reasonably wide and my pattern pieces were all shortened, I was able to cut out the whole coat from just two metres, yay! The quality of the wool is absolutely beautiful and I don't regret shelling out at all - it was worth every penny. I lined the coat in a contrast dusky blue lining fabric from Ditto Fabrics, (also sold out I'm afraid). All the main coat pieces apart from the under collar and sleeves were underlined with flannel for extra warmth.


I've only worn my coat a couple of times but I can already see it becoming a staple in my winter wardrobe. Despite the frumpy looking pattern, it feels really stylish to wear, it fits well and it's lovely and warm. It's also very me - I feel like I've owned it for years! I'm so pleased I went the extra mile when I was making it, I love it! x


Friday, 2 December 2016

Another Rusholme Skirt - with cherries on

Hot on the heels of my first version comes my second Rusholme skirt from A Beginner's Guide to Making Skirts. This time I omitted the front centre pleat, making this an even easier skirt to sew - it barely took an hour in actual sewing time.


The fabric is the cutest cherry print needlecord which Marie kindly picked up for me from Leicester market. I love it! Because needlecord has a tendency to stick to your tights I lined this version with some lovely quality Venezia lining, gifted to me by Jo Sews when we met up on Goldhawk Road last year. I used this method for adding it, simply deducting the length of the facing from the top of the skirt pieces when I cut it out.


It's such a perfect little winter skirt, I know I'll be wearing it a lot. And as the background colour to the cherries is navy, it will match everything.

Obligatory hands-on-hips book cover shot!

Next up....my gold disco top! I'll be road testing it tomorrow and will report back on Monday. I'm hoping it will perform well on the dance floor (ahem!) Have a good weekend. x


Sunday, 20 November 2016

Preparing for a red coat

Over the past few weeks I've been slowly gathering supplies for a winter coat, which I'm pretty excited about. I already have a gorgeous navy winter coat from Jaeger which I saved up for - I've worn it every winter for about five years and it's still going strong, but I fancy a change. I'd like a red coat, partly because I don't own one and I'd like to remedy that, but also because I need a coat to match my new red gloves. Only joking! (or am I?…)


When I was searching for inspiration I did spot a couple of very glamorous red coats pinned to my Red board on Pinterest, but they're both quite voluminous shapes, which tend to dwarf my petite frame. 


What I was after was a classic fitted coat with a collar, a bit like a longer version of this Modcloth jacket.


I found it in McCall's 7058. This pattern has a truly hideous front cover which does an excellent job of masking the classic, well drafted pattern within. 
There are plenty of options all based around the same princess-seamed shape: a short, Chanel-style collarless jacket, two hip length jackets (one belted, one hooded), two mid length coats and a long hooded coat (phew). I've decided to go for a mash up of views B and C.


Manju made a very stylish interlined wool version here and I've taken some great tips from her excellent review. My main coat fabric will be a wool twill coating from Fabric Godmother, which now seems to be sold out unfortunately.


It's a lovely bright red and feels very warm. I know Manju also interlined/underlined her version with pyjama flannel for extra warmth and I'm still debating whether to do this on mine. What do you think?

I'll be lining it with this Dusky Steel Blue lining fabric from Ditto which I think is a nice contrast to the red. 


I've also bought some good quality interfacing from English Couture and have invested in a tailors clapper for a professional finish on all those seams. I'm all set!

I did a tissue fitting and the size 14 seems to fit well. The good thing about this pattern is that there is a petite sizing option which I've taken full advantage of. Each pattern piece is shortened by a total of two inches: an inch at bodice height and an inch at skirt/knee height, which is a perfect proportion for my build. The sleeves are also shortened at two different points without affecting the shape of the elbow dart.

Now I just need to steam shrink my wool fabric and pre-wash my lining, then I can start cutting out (eek!) There's no immediate deadline to get this coat finished, so I intend to take my time over it and enjoy the process - I'll keep you posted on my progress! x


Thursday, 17 December 2015

Christmas Joan Dress

Four years ago I made myself a fitted red dress with a tie neck, heavily influenced by the lovely Joan from Mad Men. That dress has been a real success. It's made from double knit, so as well as being warm, it has a handy amount of stretch to accommodate festive eating marathons. Alas, it's now gone slightly bobbly and is a bit past its best so I needed to replace it. And what better pattern to use than Sew Over It's very own Joan Dress! It has just the right amount of festive dressiness and fifties glamour and was actually inspired by the beautiful Miss Holloway herself - perfect!


For fabric, I applied the 'if it ain't broke, don't fix it' philosophy and went for red again. I picked up some posh double crepe at a recent John Lewis fabric sale, which at £11 a metre was an absolute bargain for such lovely quality fabric. For the lining I kept it simple and used a plain red poly viscose from Goldhawk Road. The girls at Sew Over It had kindly sent me a copy of the Joan pattern when it first came out so I was ready to rock.


Having read on a couple of reviews that the finished dress was very fitted, I decided to err on the side of caution and cut a size 12. Big mistake. Once it was sewn up the dress was way too roomy - it was wearable but just didn't have the oomph that comes with a closer fit. Doh! I did actually compare the pattern pieces to my bodice block pieces beforehand and they were pretty similar, so I think it may had been something to do with the fabric which has a bit of stretch to it. Never mind, a bit of unpicking* and re-sewing of seams later and it finally fitted correctly. Not too skin tight (I need to be able to stuff my face in it and pick things up off the floor remember!) but just right. *This is a slight euphemism - it actually took an entire day. 

Apart from the cock up with sizing, the only other changes I made to the pattern were to shorten the skirt by two inches and reduce the height of the back kick pleat by another two inches. I'm a shortie (5'2") but even if I was normal height I'd still have been in grave danger of flashing my arse. That split comes up very high! I'd recommend taking a few leg measurements beforehand.


The dress is fully lined (including sleeves) so it took me a loooong time to cut everything out and mark all the pattern pieces up. I then spent a whole afternoon on the sofa when my son was ill, pinning the darts ready for sewing. Including the outer dress and lining this adds up to a LOT of darts - 20 in fact! It was worth the tedium though, I think the darts are what gives the dress its fabulous fifties shape.


The pattern instructions were easy to work from and I had no problem following them. For trickier steps such as attaching the tie collar and sewing the back kick pleat, there are additional tutorials on the Sew Over It blog. One good thing about the pattern is that all the seams are hidden inside the lining, which means you don't have to finish them if you don't want to, hoorah! It gives the dress a very neat, professional finish - in fact this is probably the most polished looking dress I've ever made. The picture below shows the dress inside out, apart from the hem being visible, it's almost wearable!

View of the lining
It's not a quick sew by any stretch of the imagination (there's quite a bit of hand sewing), but it's definitely a pattern to consider for a special occasion. The fabric, the lining, the design and the finishing details all add up to a very smart dress! I'm delighted with it and I think it will be perfect for the festive season. x


The Joan pattern was given to me free of charge for review. All views my own.


Tuesday, 17 March 2015

Barkcloth skirt


Behold my barkcloth skirt! I wanted to make a relatively simple garment to show off the lovely retro fabric design as much as possible, so decided on a vintage pattern from the 1950's. The pattern is Simplicity 3983 which has just the one seam going up the back, so no worrying about pattern matching side seams. As you can see, I didn't make much of an effort to match the shaped pockets and front waistband either. I don't care though, it looks fine!


Having already made this skirt once before, I only made one pattern change, which was to shorten the length by an inch (I'd already taken a gigantic eight inches off the original pattern). I also made a few changes to the construction. I replaced the centred zip with an invisible one and added a faced waistband instead of a Petersham ribbon facing, which is how I finished the waistband on my first version. I also positioned the zip so that it runs through the waistband (like you find on the Delphine and Ginger skirt patterns). I know some people like a waistband starting above the zip, but I personally prefer them integrated. It's not authentically vintage but I like how it looks.


I added a white silk-cotton lining using this method, and used some scraps of cotton lawn for the pockets.


The barkcloth fabric is Ripple in Navy from The Village Haberdashery, part of the Time Warp collection by Jessica Jones. Here's what I would advise if you're thinking of working with barkcloth:

- The feel of barkcloth is quite rough against the skin, so if you're planning on using it for garment making, I'd advise underlining with a very light fabric or adding a separate lining.

- Barkcloth has quite a loose weave and is liable to stretch slightly when cut on the bias. This happened with my curved front pocket facings, but it actually turned out in my favour as they now allow a bit more room to get my hands in!  Just be careful to staystitch any curved edges and try not to over stretch when pressing.

- The fabric frays and unravels quite noticeably, so I ended up overlocking all raw edges quite early on in the proceedings.

Apart from that it didn't behave any differently from a linen or cotton. I used a regular needle in my machine and it sewed together beautifully. Even though I knew the fabric was brand spanking new, I still felt like I was working with a piece of 1950's barkcloth, it just looks vintage!


I'm delighted with the finished skirt - it's contemporary but the fabric gives it a vintage edge, which is my favourite combination! I've paired it with a jumper for these pictures because it's still cold and I'm a wuss, but I can totally see it working with this, this, this and even this!!

And because I used a vintage pattern, I'm counting this as my first contribution to this year's Vintage Sewing Pattern Pledge. I only pledged to sew up one pattern, but it's not this one, so consider this a bit of a Brucie Bonus!  x


Fabric was given to me free of charge for review. All views my own.


Wednesday, 7 January 2015

Boiled Wool Coat Plans

Let's talk about boiled wool shall we?! I've been interested in this fabric for a while, primarily because sewing with it allows many shortcuts for the lazy amongst us (of which I am queen!) For those of you who aren't familiar with boiled wool, it's a wool fabric that's pre-shrunk by boiling at high temperatures (the clue's in the name!) This process causes the fibres to compress and interlock, resulting in a soft, springy felt-like fabric. Because of the tightly woven fibres, boiled wool is impressively resistant to wind and rain, making it perfect for outdoor garments such as coats, jackets and hats. From a sewing point of view, it has two major advantages:

- Because of the tightly woven fibres, it doesn't fray when cut, so no need to finish seams. Hoorah!

- If you're after a winter coat, you don't need to add underlining or interlining for extra warmth. In fact, if you're after a very simple coat or jacket, you don't even need to line it at all if you don't want to (more on this in a minute).


With this in mind, I thought boiled wool would be a perfect choice for my next project: a casual coat/cardigan. Design-wise I had a very simple shape in my head: above the knee and slim fitting with no collar. I was initially thinking of drafting my own, but I've come to the conclusion that I need to practice my drafting skills on a few simple garments first before unleashing them on a coat! I'm getting there though, I've almost finished drafting my first dress so look out for that soon. 
As far as inspiration goes, I was rather taken with the Named Patterns Andy Coat. When I met up with Scruffy Badger recently, I was able to inspect her beautiful version at close quarters and was mightily impressed with the tailoring details: bound buttonholes, welt pockets, fully lined, two piece sleeves etc. I was sorely tempted, but to be honest the pattern involved a bit more work than I was willing to put in (I told you I was lazy!) But then I came across this Collarless Open Coat pattern from Burda (03/2012 #110).


It's a very simple design with princess seams, two-piece sleeves, centre back seam and no collar. It's also an edge-to-edge style, which means no buttons. I'm not sure how I feel about this - on the one hand it's a casual coat for spring time, so it probably won't need buttoning up, but then again, it might drive me mad not having any. It's a tricky one… it's not totally edge-to-edge, there is a slight overlap, so I may sew on a few covered snaps as contingency. I'll have a think about it and let you know what I decide. Any thoughts?


I actually made a muslin of the coat (gasp) - I cut a Burda size 40 which looks just a tad too big all over (obviously the sleeves will need about half a foot chopping off). So I think I'm going to size down all over, take a tiny bit more off the shoulders and shape it in very slightly at the waist. I'll also need to shorten the whole thing by about six inches to get the length I want. Nothing too dramatic, and after that I'll be ready to start working with my boiled wool, eek!

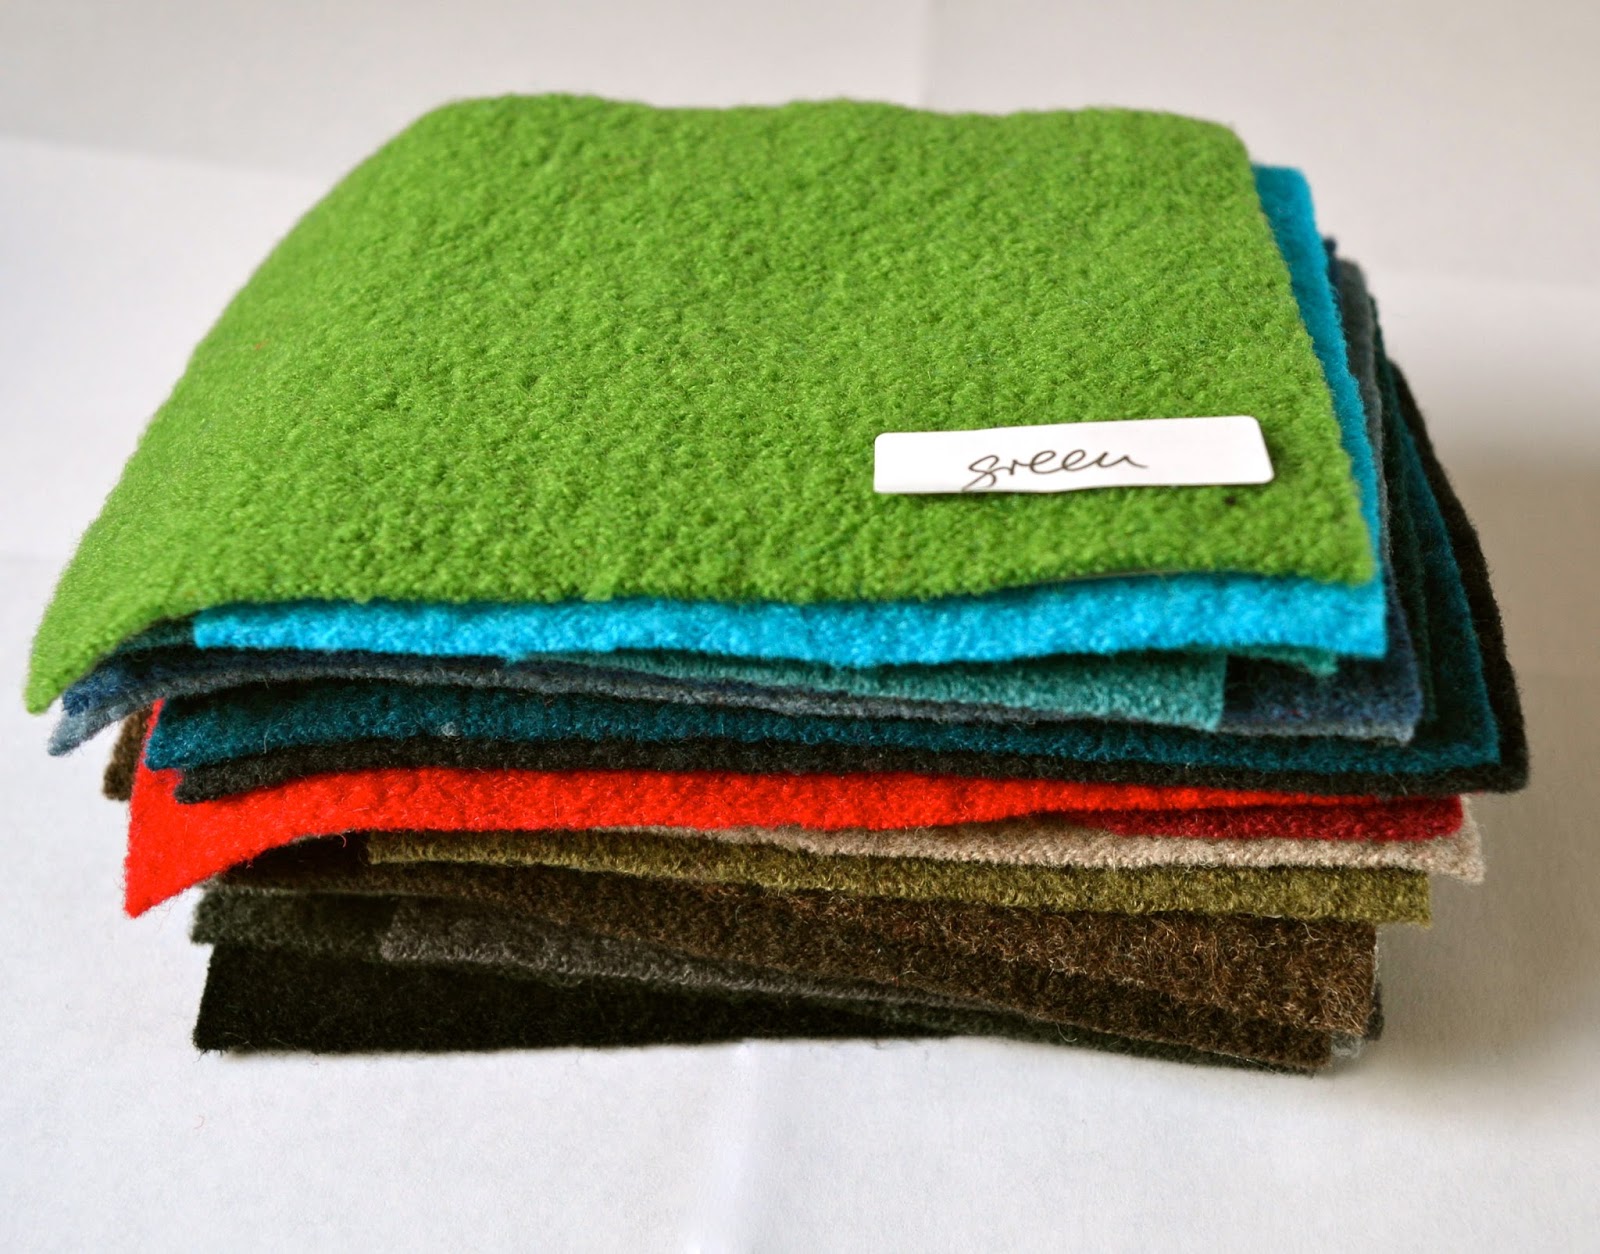
The boiled wool I'll be using is from Dragonfly Fabrics who stock a wonderful selection of colours (see first picture) The choice is almost overwhelming so I requested lots of samples to play with beforehand, eventually settling for Light Grey Blue. 


This photo isn't really a true representation of the fabric colour - it's much more saturated in real life, a lovely airforce blue. Dragonfly Fabrics are very kindly giving me two metres of boiled wool for my coat, so I hope I can do it justice. I haven't worked with boiled wool before, so asked Dorte at Dragonfly Fabrics for advice on pre-washing. She advised against pre-washing for a coat (I'll probably get it dry cleaned in the future if it needs it) but if I was making a dress or skirt from boiled wool then it can be pre-washed. It should be washed on a wool cycle and dried flat, but be prepared for around 10% shrinkage. 

Although I could probably get away with not adding a lining, I've decided to add one to give the coat more of a professional finish. Having done a bit of detective work in the shops, all the boiled wool coats I saw had lovely, shiny contrast linings, so that's what I'm planning. 

So there you have my boiled wool plans to date. If you've worked with boiled wool before and have any other tips or advice to share, please jump in. My fabric should arrive next week and then the fun begins! Have a good day. x


Monday, 1 December 2014

Herringbone Kelly skirt

I was decidedly on the fence when I made my first Kelly skirt, but it's since become one of my most worn me-made separates. Who'd have thought it?! In fact I like it so much, it was the starting point for my latest skirt. I say 'starting point' because it veered totally off piste during its creation, but the bare bones are definitely from the Kelly pattern, so the name stays.


A lot of the changes were purely down to necessity because of my fabric choice. Well, not necessarily my fabric choice, more my lack of yardage. I bought a metre of this Organic Cotton Herringbone from Ray Stitch during my pattern cutting weekend thinking it would be perfect for a simple A-line skirt. However, between buying it and gearing myself up to cut into it, I changed my mind and decided it had to be a Kelly skirt. The trouble is, the Kelly skirt pieces are quite wide because of the pleats, and the pattern requires slightly more than a metre. I managed to cut my first version out of a metre by placing some of the pattern pieces upside down, but the herringbone design is directional, so that wasn't an option.

In the end, I decided to keep the pleats in the front of the skirt, but not in the back. I also couldn't be bothered with all the buttons and buttonholes, so decided to lose the button placket and add a central back zip instead. To do this, I followed Busy Lizzie in Brizzy's tips from this post. I cut the front piece on the fold, using the buttonhole markings as the centre front seam and the back as two separate pieces, adding a seam allowance to the fold line for the zip. Behold, no buttons or placket!


I didn't have room to cut the pocket facings in the same direction as the rest of the skirt, so they face the opposite way. I'm calling it a design feature.


I even managed to include some scraps from my Chambray Bow Blouse for the pockets, yay!


The herringbone fabric is pretty heavyweight, which is great for holding a pleat, but also means it's quite scratchy against the skin, so a lining was needed. I used navy satin left over from my Lace Laurel top for the lining using this tutorial. When adding a full lining, you can often get away with not finishing seams as they're all hidden away, but not in this case! Both fabrics frayed terribly, so all seams were overlocked to within an inch of their lives.  


I did make quite a major error at the cutting out stage - I folded the pleats in on the the back pattern piece, but really should have added more width for my backside. The back is now very slim fitting across the bum - almost like a pencil skirt. In fact, the finished skirt looks more like Simplicity 2451 than a Kelly skirt - the A-line shape has totally disappeared!


Back view…ahem
Because of this, it's not quite the skirt I was hoping for, mainly because it's so tight fitting across the bum, but that's my own fault for lack of foresight. It's not a total win, but definitely not a fail either. It's still a lovely, cosy skirt for winter and the blue and cream colourway seems to go with every conceivable top and cardigan in my wardrobe.

I did try to get some shots of me without my hands in my pockets but was continually photo bombed. Ah well, Happy Monday! x


I couldn't resist him, he's too cute! 


LinkWithin

Related Posts Plugin for WordPress, Blogger...