Showing posts with label Wendy Ward. Show all posts

Wednesday, 4 April 2018

A Beginner's Guide to Sewing with Knitted Fabrics - blog tour

Today it's my stop on the Beginner's Guide to Sewing with Knitted Fabrics blog tour. This is Wendy Ward's latest book and the perfect starting point if you're wanting to branch out and start sewing with knits. The book includes full sized paper patterns for six core garments (T-shirt, Wide Leg Trousers, Tank, Lounge Pants, Cardigan and Skirt) with a variety of hacks to give a choice of twenty different variations. 


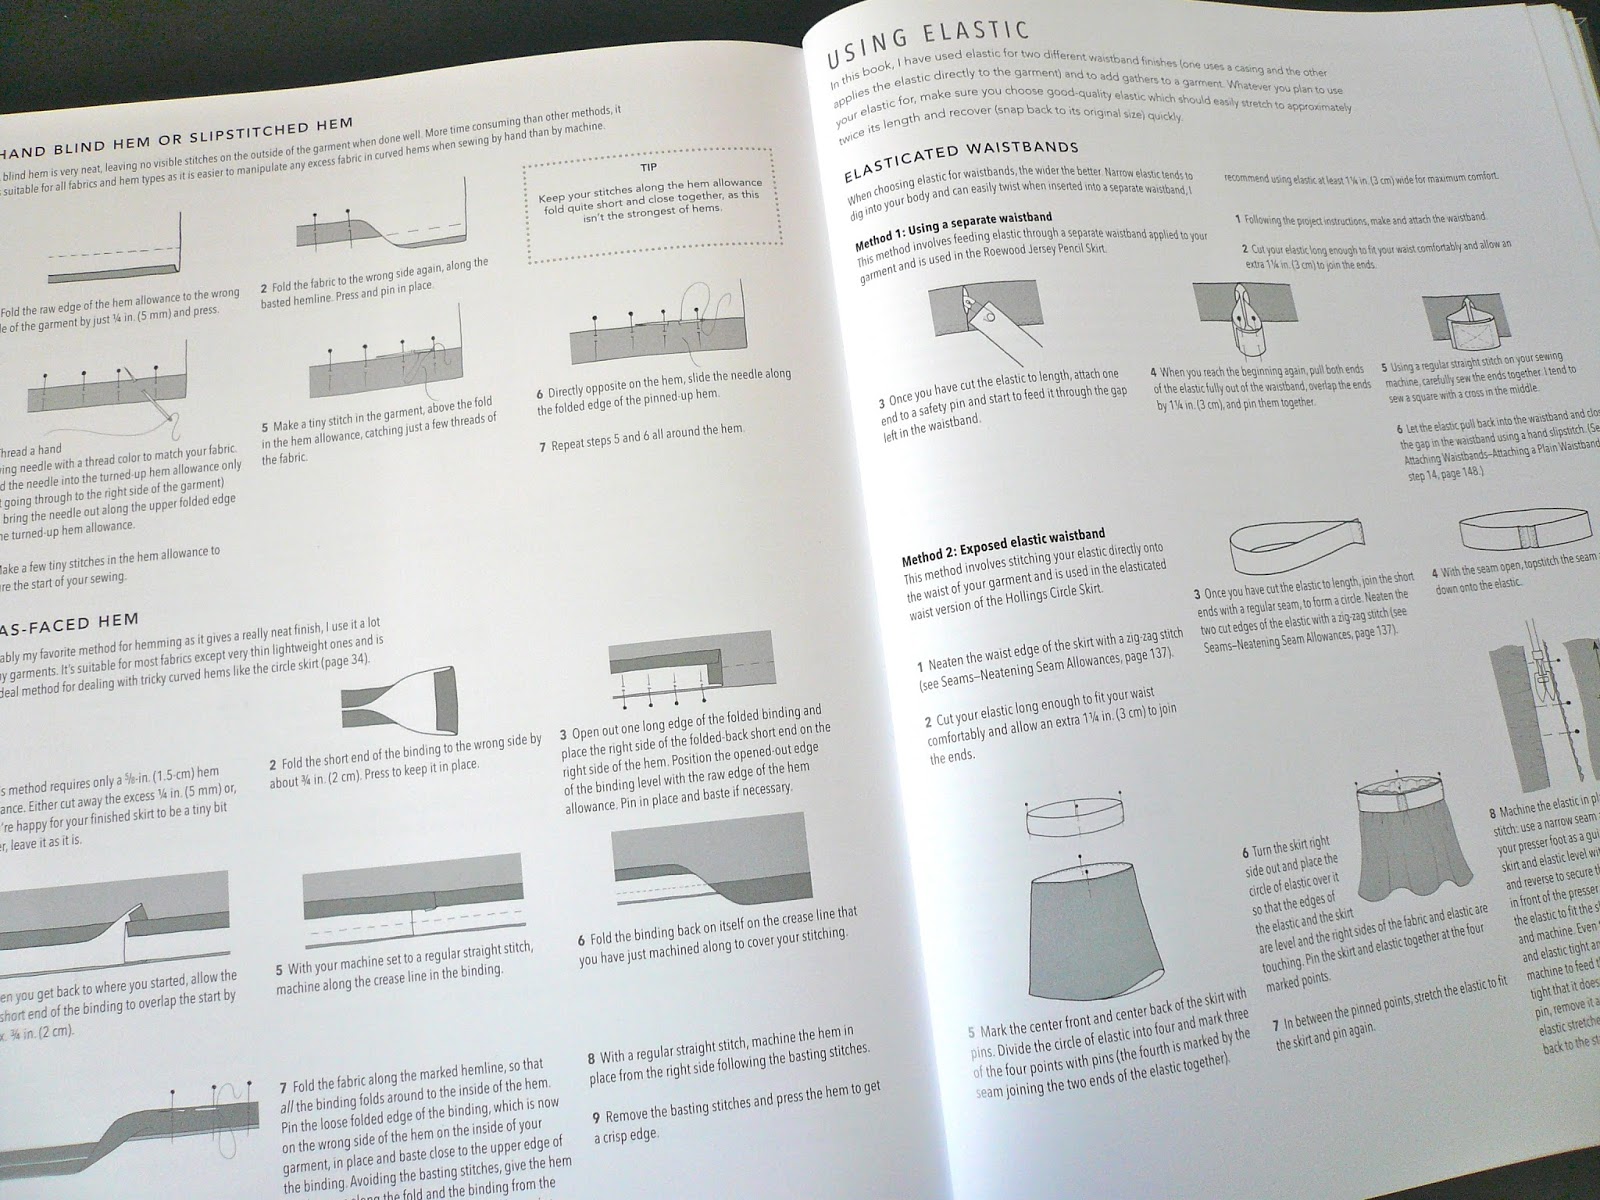
The book is laid out in a similar way to Wendy's first book A Beginner's Guide to Making Skirts (reviewed here). For each project there are step-by-step instructions with clear diagrams, with methods for tackling specific techniques (adding a neckband, hemming, using elastic etc) included in a comprehensive 'techniques' section. These techniques are noted at the start of each project and I'd recommend reading up on them before you start. In fact I'd strongly recommend reading the "How to Use This Book' section on page 9 before you do anything, as it lays out everything you need to know to get the most out of the book.  


The patterns are printed on both sides of each sheet and overlap, so you will need to trace them. Also, some larger pieces (such as trouser legs) may be printed in two halves, so make sure you know where the two halves are! A helpful guide showing which projects and pattern pieces are printed on each sheet can be found on page 23. One thing I found slightly annoying is that there are no sizes i.e. size numbers printed on the patterns, just the different pattern markings for each size. If you're confused about which markings relate to your size (as I was) there's a key on the inside back page of the book.

Sizes range from US size 4 (UK 8) to US 22 (UK 26) and the garments are sized depending on which area of the body the garment will fit most closely. The two trouser patterns are sized on hip measurements, the cardigan, T-shirt and tank are sized on bust measurements and the skirt is based on waist measurement. Just make sure you're working from the correct area of the body before you start.


I have to be honest and say that a couple of the patterns were not really my style, most notably the Longshaw Skirt. The T-shirt and tank were similar to designs I've made lots of times before and the wide legged trousers didn't appeal. It was therefore a toss up between the chic and versatile Kinder Cardigan or the Monsal Lounge Pants. Now Lounge Pants have never really been on my sewing radar, but the weather was cold and miserable at the time of making, and all I wanted to do was lie on the sofa, so lounge pants it was.


There are three pattern options: full length, with or without cuff, and shorts length. I went for the cuffed version, adding the optional cut away pockets with a contrast pocket band. One very helpful thing that Wendy does in the book is list the fabrics that each of her samples are made from. Based on this I chose a navy ponte for the main trousers with a contrasting grey marl in the same fabric for the cuffs, waistband and pocket bands. The quality of the ponte was lovely - a nice medium/heavy weight with a good amount of stretch. With hindsight, I should perhaps have chosen a lighter weight fabric for the pocket bands as the double layers of ponte ending up very bulky to sew through. 


The instructions were a breeze and actually employed a different method than I've previously used for trouser making. Usually I would make up both legs separately, then put one leg inside the other and sew the front and back crotch seams in one go. The method in this book is to sew the crotch seams first - which give you an entire front section and an entire back section - then sew the inside leg seams. Once the pockets are added you simply sew up the side seams and you have a pair of trousers! This seemed like a much simpler method to me and one I'll definitely use again.


Trying to replicate the model's pose above...
The fit is supposed to be loose (not baggy) with a tapering leg shape. I like the tapering leg shape but I could probably have done with shortening them a bit as they noticeable crumple below the knee. The calf section is also a bit tight, but that may be down to my newly discovered runners calves (ahem). As predicted, they're supremely comfortable and perfect for lounging stylishly around the house. When the 'Beast from the East' hit the UK recently they were an absolute godsend - cosy, comfortable and a definite step up from pyjamas!


There's a lot of work that's gone into the writing and production of this book and this is evident throughout. It's an excellent first guide for beginners and a very good source of patterns and advice for those who are already familiar with sewing with knits. Like the look of it? Well you're in luck, as MAKEetc.com are offering readers of my blog a 25% discount off the purchase price. Simply purchase through their website and enter the code BLOG25 at the checkout. The discount is valid until 21st April 2018.


A Beginner's Guide to Sewing with Knitted Fabrics was given to me for review by CICO Books and the fabric for my project was kindly supplied by Minerva Crafts. All views my own. 

Friday, 2 December 2016

Another Rusholme Skirt - with cherries on

Hot on the heels of my first version comes my second Rusholme skirt from A Beginner's Guide to Making Skirts. This time I omitted the front centre pleat, making this an even easier skirt to sew - it barely took an hour in actual sewing time.


The fabric is the cutest cherry print needlecord which Marie kindly picked up for me from Leicester market. I love it! Because needlecord has a tendency to stick to your tights I lined this version with some lovely quality Venezia lining, gifted to me by Jo Sews when we met up on Goldhawk Road last year. I used this method for adding it, simply deducting the length of the facing from the top of the skirt pieces when I cut it out.


It's such a perfect little winter skirt, I know I'll be wearing it a lot. And as the background colour to the cherries is navy, it will match everything.

Obligatory hands-on-hips book cover shot!

Next up....my gold disco top! I'll be road testing it tomorrow and will report back on Monday. I'm hoping it will perform well on the dance floor (ahem!) Have a good weekend. x


Monday, 14 November 2016

A Beginner's Guide to Making Skirts - blog tour

When I first learnt to sew in 2009, my dressmaking teacher advised me to master the art of skirt making first. Her reasoning being that women's bottom halves are generally easier to fit than their top halves. I searched in vain for a book that would teach me to do just that, but never found anything suitable that focused exclusively on skirts. How I wish A Beginner's Guide to Making Skirts by Wendy Ward had been around at that time!


The book is exactly as described: a comprehensive guide to making skirts with full size paper patterns. Wendy focuses on eight basic skirt shapes: circle, A-line, stretch pencil, wrap, bubble, tailored pencil, front opening and culottes and offers three variations for each style. That's a lot of skirts to get your teeth into!


The simplest version of each style is shown made up in denim, which I think is a nice touch as it gives you a good idea of the basic shape before you start getting adventurous! The majority of styles are ones I'd make and wear, the only exception being the bubble (or puffball) skirt which I was never a fan of, even as a teenager in the 80's!  

There are step-by-step instructions with clear diagrams for each project variation, with basic methods for inserting zips, attaching waistbands, adding linings etc, all included in the excellent Techniques section at the back of the book.


This section is massive and it really does cover everything you need to know, not just about skirt making but about sewing in general - it's almost a sewing book in its own right! The techniques required for each project are listed at the beginning of each skirt 'type' and it's definitely worth reading through them beforehand so you have an idea of what you'll be doing. You'll still have to flick between different parts of the book to look them up, especially if you're a beginner, but at least you'll be prepared. 


While we're on the subject of preparation, I'd also recommend you read the Using Paper Patterns section very carefully before you start. I dived straight in and consequently tripped up a couple of times. Firstly, the pattern piece for the skirt I made (the Rusholme) is printed in two halves (top half and bottom half) on two different pattern sheets, which flummoxed me a little. Secondly, some pattern pieces, such as waistbands and facings, are used for more than one project. I was looking in vain for ages for a facing for the Rusholme skirt before I re-read the instructions and realised I had to use the pattern pieces for the Fallowfield skirt!

Once you've located your pieces you'll need to trace them from the three large pattern sheets, as the sheets are printed on both sides and the patterns overlap. I have to admit, a Burda-style pattern road map is not my favourite way to work, but having said that, once I'd worked out a few basics (see paragraph above!), it didn't actually take long to trace them off.


The skirts in the book are printed in order of difficulty and the Rusholme A-line skirt I chose is somewhere in the middle. The skirt is shown with three variations: short with a waist facing, knee-length with waistband and centre front pleat or long with pockets and waistband.

In the spirit of the book I chose to mix and match between variations, making a short skirt with a waist facing but also including a centre front pleat. The book actually advises not to use a facing with the pleated version (and I can see why as there is more fabric in the pleat to be supported) but I decided to be a rebel and throw caution to the wind.


Sizes are based on your hip measurements and range from 34¾ inches (88cms) to 51 inches (129cms). This is the equivalent of UK sizes 8-26 or US sizes 4-22. I cut a size 38 inch hip but graded to the next size up at the waist as the finished measurement would have been too tight. I also used the length of the smallest size to save having to shorten the pattern. These were the only changes I made to the pattern and as there were just two skirt pieces and two facing pieces it didn't take long to sew at all.

The fabric I used was a fine wool suiting (Muted Grid in Denim) from Fabworks, who kindly supplied the fabrics for this blog tour. It's a reasonably lightweight fabric with a good drape and the ability to hold a sharp crease, which was exactly what I was after. It does fray quite noticeably if handled too much, but apart from that it was a pleasure to work with.


The finished skirt fits me like a glove: it has the perfect amount of ease around the waist (I'm glad I went up a size!) but still has a nice shape. I love the roominess of the inverted pleat too, it almost looks like I'm wearing a pair of culottes. As for the illegal facing/pleat combination I'm happy to report it hasn't caused any problems so far, probably because my fabric wasn't too heavyweight.

A Beginner's Guide to Making Skirts is an excellent introduction to skirt making, not just for beginners but for more experienced sewers too. As Wendy says at the start of the book, "The devil is in the detail and I'll show you how to perfect those details…I'm a stickler for doing things right and taking the time needed to get the best results" I'm definitely pleased with the results - so much so that I've already cut out a second skirt!


A Beginner's Guide to Making Skirts was given to me for review by CICO Books and the fabric was supplied by Fabworks. All views my own.


SaveSave

Monday, 23 May 2016

A Tale of Two Walkleys

Remember the striped Walkley top by Wendy Ward I made last year? It's been such a favourite of mine (I wear it at least once a week, often twice) that I knew a dress version for summer was on the cards. I like the fit, it's quick and easy to sew and you only need a metre of fabric.


The fabric I used was a lovely cherry blossom jersey from Girl Charlee - a light cotton blend with a good stretch to it. I originally ordered one metre but ended up with two, as a 'print smear' was discovered on the original batch and I was sent a replacement. It took me ages to actually find the tiny print fault and I'm sure I'd never have even noticed it amidst all that cherry blossom. I appreciate the gesture though and I did end up with two metres to play with, so thanks Girl Charlee!

When I first made the top, I deliberately cut the smallest of the three sizes offered as I wanted a closer fit. This time round I cut the next size up as I didn't want the dress version to be too clingy. Apart from removing a 1" wedge from the neckline, I made no other changes to the pattern. It really is an easy sew: shoulder seams and side seams sewn with an overlocker, then neck, armholes and hem turned under and sewn with a double needle. That should have been the end of it, but alas, I sewed the side seams with a 1.5cm seam allowance instead of the specified 1cm. Doh! The resulting fit was a bit clingy for a dress, but perfect for a top… so I chopped the bottom off and hemmed it accordingly. I then cut and sewed a second dress, making sure I used the correct seam allowance this time. Lucky for me I had that extra metre to fall back on!

Top version….
…and dress version!
The Walkley pattern is a very simple shape, but it really works for me. The neckline's just the right height (and I'm fussy about anything too high) and the cut of the capped sleeves gives it a youthful edge without making me feel too mutton-like.


I now have two garments from the same fabric and I couldn't be happier with them. The dress is slightly fitted but still roomy enough for a few ice creams. It's also easy to dress up or down with flip flops or clogs. And the top is perfect for jazzing up a pair of jeans or a denim skirt. I'll be packing both of these for my holidays this summer.  x


Tuesday, 3 November 2015

Walkley in stripes

Behold my latest stripey top, made from the Walkley pattern from Wendy Ward's MIY Collection.


I have to be honest, some of the MIY Collection patterns are a little too unstructured for my taste, but this one caught my eye after seeing Scruffy Badger's deliberately mismatched striped version. I'm not edgy enough to go for mismatched stripes myself, but I liked the fact that the top looked both contemporary and smart, so into the basket it went. 


The Walkley is a very simple pattern for a sleeveless vest or dress. The PDF version tiles together using just eight sheets of A4. And if, like me, you don't go down the different fabrics/colour blocking route, there's only one front and one back piece to cut out, yay! The only thing I was wary of was the boat neck. I can't tolerate very high necks and this one looked a bit borderline. I always seem to end up with gaping too, especially if the boat neck is very wide. I compared the pattern piece to other boat necked patterns I own and it did seem wide, so I removed a 1" wedge from the neckline using this tutorial. That was the only adjustment I made.

The pattern comes in three sizes depending on your bust measurement. My measurements corresponded with the middle size, but I cut the smallest size as I wanted a closer fit. The style is supposed to skim, not be skin tight. The finished vest is quite fitted, but that's the result I was after and I'm pleased. If I was using a lighter, more clingy fabric, or making the dress version, then I'd definitely cut a larger size!


Constructing the top couldn't have been easier, not surprising really as the front and back are cut from the same piece. I sewed the whole thing on my regular sewing machine for a change. I used a jersey needle and sewed the shoulder seams and side seams with a tricot stitch, which is one of the stretch stitch options on my machine. I only discovered this stitch recently when I was looking through my instruction manual for something else and it's great! It has lots of stretch but is very strong. The only downside is that it takes ages to sew. The neckline, armholes and hem were turned under and hemmed with a double needle. These areas are all drafted with additional shaping so that they lie flat when folded, which I thought was a nice touch. 


Part of the general pattern instructions is a Working with Knit Fabrics section which gives some useful tips, including stabilising shoulder seams with tape. A tiny gripe, but I would have preferred this tip to have been in the step-by-step instructions instead - it's the sort of thing that can easily be overlooked in a general section. There was also no instruction to stay stitch or stabilise the neckline, which I think is especially important for a wide boat neck. Having suffered from baggy necklines in the past I wasn't taking any chances and zig-zagged standard stay tape to my neckline, about 1cm from the edge. This, coupled with the wedge I removed from the pattern piece definitely made the neckline feel more stable. Apart from these two points, I found the instructions were well explained with clear illustrations.

The fabric I used was a Kitt waffle knit from Fabric Godmother, which tragically they seem to have sold out of since I bought it. It's a lovely ponte de roma knit with an unusual waffle texture on the right side and a soft, fleecy texture on the inside. It has a decent amount of stretch but is still quite a stable knit - there was no rippling on the hems. I think it works particularly well with this pattern.


I'm pleasantly surprised how much I like the Walkley vest! Although it's simple, it feels like a cut above lots of my other striped tops (of which there are many). I'll almost certainly be making other versions, especially as it's so quick to put together. Happy Tuesday! x


LinkWithin

Related Posts Plugin for WordPress, Blogger...