Showing posts with label A-line skirt. Show all posts

Friday, 2 December 2016

Another Rusholme Skirt - with cherries on

Hot on the heels of my first version comes my second Rusholme skirt from A Beginner's Guide to Making Skirts. This time I omitted the front centre pleat, making this an even easier skirt to sew - it barely took an hour in actual sewing time.


The fabric is the cutest cherry print needlecord which Marie kindly picked up for me from Leicester market. I love it! Because needlecord has a tendency to stick to your tights I lined this version with some lovely quality Venezia lining, gifted to me by Jo Sews when we met up on Goldhawk Road last year. I used this method for adding it, simply deducting the length of the facing from the top of the skirt pieces when I cut it out.


It's such a perfect little winter skirt, I know I'll be wearing it a lot. And as the background colour to the cherries is navy, it will match everything.

Obligatory hands-on-hips book cover shot!

Next up....my gold disco top! I'll be road testing it tomorrow and will report back on Monday. I'm hoping it will perform well on the dance floor (ahem!) Have a good weekend. x


Monday, 14 November 2016

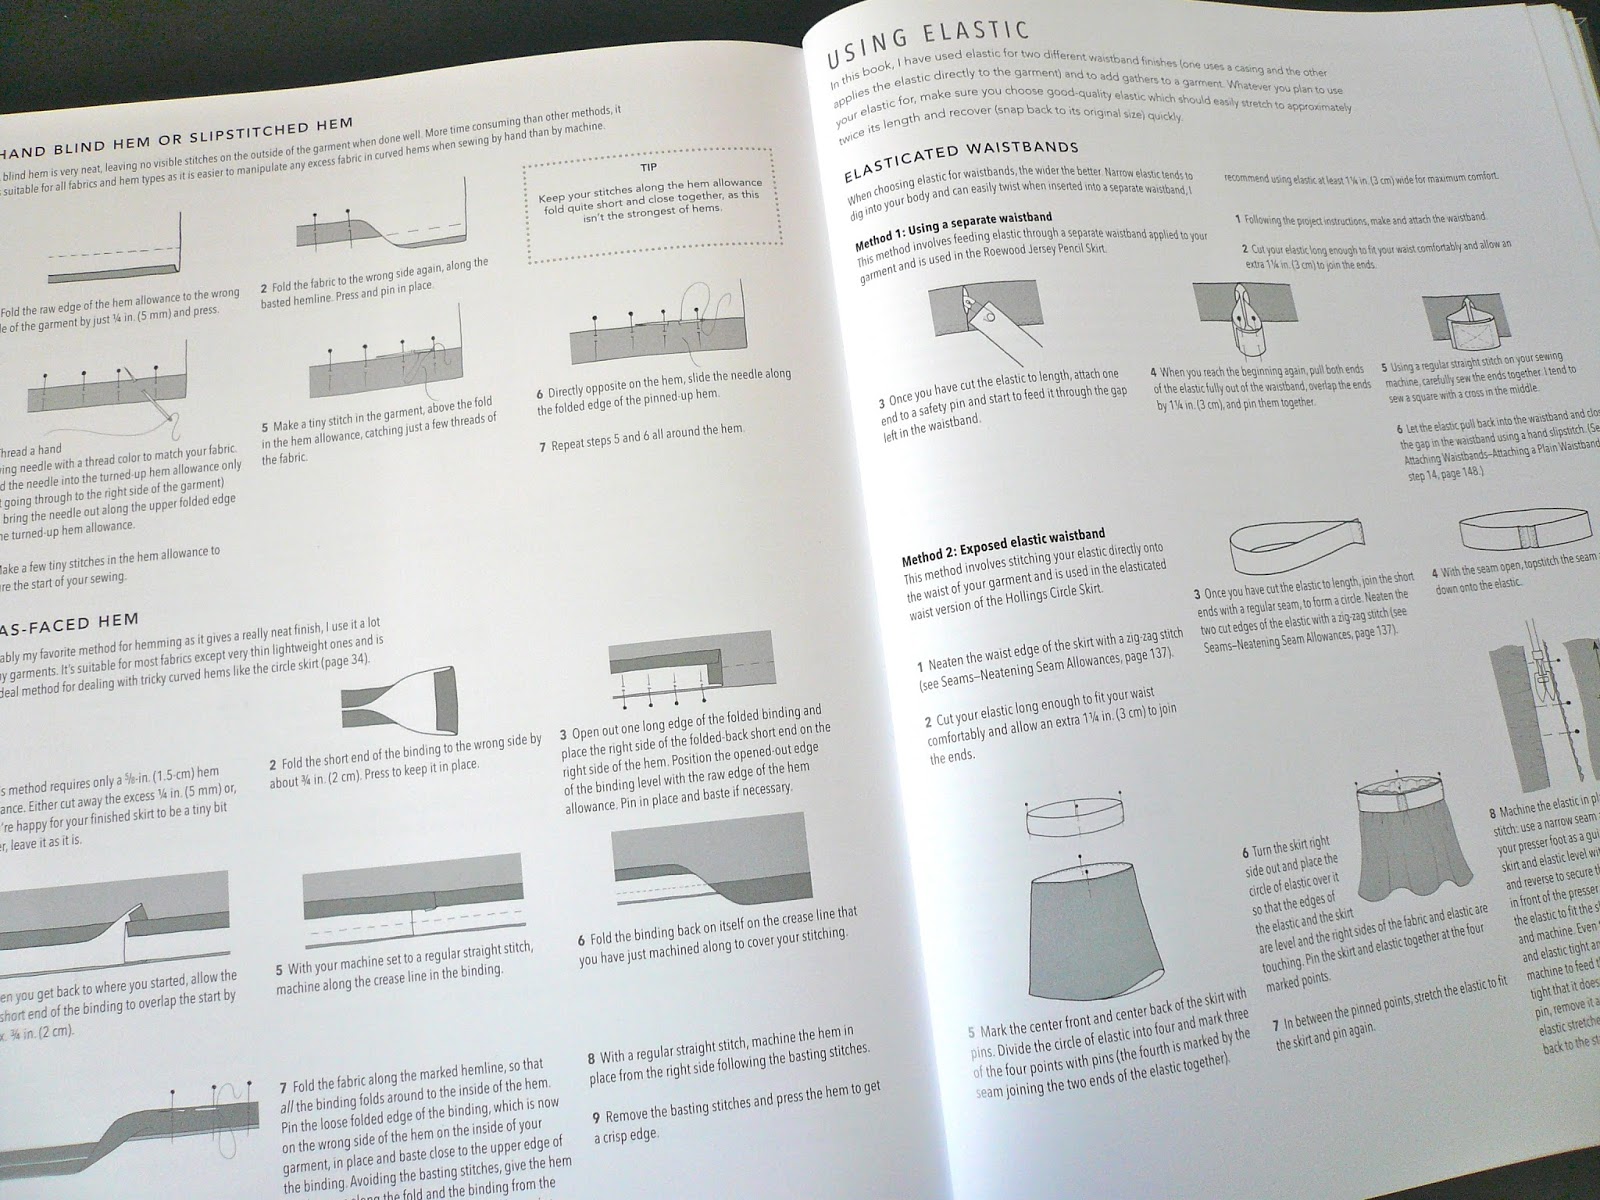
A Beginner's Guide to Making Skirts - blog tour

When I first learnt to sew in 2009, my dressmaking teacher advised me to master the art of skirt making first. Her reasoning being that women's bottom halves are generally easier to fit than their top halves. I searched in vain for a book that would teach me to do just that, but never found anything suitable that focused exclusively on skirts. How I wish A Beginner's Guide to Making Skirts by Wendy Ward had been around at that time!


The book is exactly as described: a comprehensive guide to making skirts with full size paper patterns. Wendy focuses on eight basic skirt shapes: circle, A-line, stretch pencil, wrap, bubble, tailored pencil, front opening and culottes and offers three variations for each style. That's a lot of skirts to get your teeth into!


The simplest version of each style is shown made up in denim, which I think is a nice touch as it gives you a good idea of the basic shape before you start getting adventurous! The majority of styles are ones I'd make and wear, the only exception being the bubble (or puffball) skirt which I was never a fan of, even as a teenager in the 80's!  

There are step-by-step instructions with clear diagrams for each project variation, with basic methods for inserting zips, attaching waistbands, adding linings etc, all included in the excellent Techniques section at the back of the book.


This section is massive and it really does cover everything you need to know, not just about skirt making but about sewing in general - it's almost a sewing book in its own right! The techniques required for each project are listed at the beginning of each skirt 'type' and it's definitely worth reading through them beforehand so you have an idea of what you'll be doing. You'll still have to flick between different parts of the book to look them up, especially if you're a beginner, but at least you'll be prepared. 


While we're on the subject of preparation, I'd also recommend you read the Using Paper Patterns section very carefully before you start. I dived straight in and consequently tripped up a couple of times. Firstly, the pattern piece for the skirt I made (the Rusholme) is printed in two halves (top half and bottom half) on two different pattern sheets, which flummoxed me a little. Secondly, some pattern pieces, such as waistbands and facings, are used for more than one project. I was looking in vain for ages for a facing for the Rusholme skirt before I re-read the instructions and realised I had to use the pattern pieces for the Fallowfield skirt!

Once you've located your pieces you'll need to trace them from the three large pattern sheets, as the sheets are printed on both sides and the patterns overlap. I have to admit, a Burda-style pattern road map is not my favourite way to work, but having said that, once I'd worked out a few basics (see paragraph above!), it didn't actually take long to trace them off.


The skirts in the book are printed in order of difficulty and the Rusholme A-line skirt I chose is somewhere in the middle. The skirt is shown with three variations: short with a waist facing, knee-length with waistband and centre front pleat or long with pockets and waistband.

In the spirit of the book I chose to mix and match between variations, making a short skirt with a waist facing but also including a centre front pleat. The book actually advises not to use a facing with the pleated version (and I can see why as there is more fabric in the pleat to be supported) but I decided to be a rebel and throw caution to the wind.


Sizes are based on your hip measurements and range from 34¾ inches (88cms) to 51 inches (129cms). This is the equivalent of UK sizes 8-26 or US sizes 4-22. I cut a size 38 inch hip but graded to the next size up at the waist as the finished measurement would have been too tight. I also used the length of the smallest size to save having to shorten the pattern. These were the only changes I made to the pattern and as there were just two skirt pieces and two facing pieces it didn't take long to sew at all.

The fabric I used was a fine wool suiting (Muted Grid in Denim) from Fabworks, who kindly supplied the fabrics for this blog tour. It's a reasonably lightweight fabric with a good drape and the ability to hold a sharp crease, which was exactly what I was after. It does fray quite noticeably if handled too much, but apart from that it was a pleasure to work with.


The finished skirt fits me like a glove: it has the perfect amount of ease around the waist (I'm glad I went up a size!) but still has a nice shape. I love the roominess of the inverted pleat too, it almost looks like I'm wearing a pair of culottes. As for the illegal facing/pleat combination I'm happy to report it hasn't caused any problems so far, probably because my fabric wasn't too heavyweight.

A Beginner's Guide to Making Skirts is an excellent introduction to skirt making, not just for beginners but for more experienced sewers too. As Wendy says at the start of the book, "The devil is in the detail and I'll show you how to perfect those details…I'm a stickler for doing things right and taking the time needed to get the best results" I'm definitely pleased with the results - so much so that I've already cut out a second skirt!


A Beginner's Guide to Making Skirts was given to me for review by CICO Books and the fabric was supplied by Fabworks. All views my own.




SaveSave

Friday, 14 November 2014

Bonjour Francoise….

Just in case you think you've been transported to France, you haven't, you're still here with me and my appalling O Level French.….and the new Frenchy-style pattern from Tilly and the Buttons - the Francoise dress!


Francoise is a simple fitted dress designed for woven fabrics, with raglan sleeves, French darts for shaping and an A-line skirt. It comes in two variations: long sleeved or sleeveless, with a choice of added collar or waist tabs. I tested this pattern for Tilly prior to printing, so thought I'd share my finished Francoise with you today. My first thought when I saw the initial line drawings and photos was that the dress might be a bit youthful for me, I mean me in a mini dress, really? But I did like the raglan sleeves and French darts, so decided to go for it with a few tweaks. As I was testing the pattern, I couldn't muck around with the overall design, but I did increase the length by 1½" and omitted the collar and waist tabs for a more 'mature' look. 

I swear the hem hangs properly - I just don't know how to stand up straight
This pattern isn't as short as I originally thought. I had visions of a Twiggy-style mini dress, but actually lengthening it by just a small amount takes it to just above the knee on me which I'm happy with. Size-wise, I cut a straight size 4, but ended up taking in the waist and hips significantly. So I'd say the fit of my finished version is a 4 at the bust and a 3 everywhere else. In terms of construction, it's straight forward if you pay attention to the instructions. The pattern comes with full colour photos of key steps which really help with some of the less run-of-the-mill techniques such as the raglan sleeves and French darts. Here's a tip: although there's actually an instruction that tells you to "stay stitch the neckline and raglan sleeve lines", I still only stay stitched the necklines. There's even a photo showing you the step for goodness sake, what more did I need?! In my defence, I think it was just habit, I see the words "stay stitch" and associate them with necklines (or waistlines). I did realise before it was too late and stay stitched the raglan sleeves - make sure you do too! If you've never made raglan sleeves before, don't worry - the pieces fit together perfectly so you can't go wrong.


My other piece of advice with this pattern is to choose your fabric carefully. I, of course, did not and learnt the hard way. The dress has French darts which are large, diagonal darts coming up from the waist. They take up a lot of fabric so you don't want anything too bulky or you'll get an unsightly bulge. The fabric I used for Francoise is a lovely, heavyweight crepe in a sort of sea green. I was actually fabric shopping with Tilly when I bought it, and even though she told me it might be a bit heavyweight for the darts, I totally ignored her and went ahead and bought it (I'm stubborn like that). I don't regret it as the fabric is simply goy-jus, but she was absolutely right, there was way too much fabric for a smooth line, even on the bust darts. I ended up cutting all my darts up the middle, trimming them down and pressing them open flat. This worked, but does leave the dart edges unfinished. A small price to pay for a nice, flat dart though!

My fabric was also a bit troublesome in other areas - I realised my neck facing was far too bulky (after stitching it in place) so ended up finishing the neckline with bias binding instead. It looks fine, but doesn't have the clean, stitch-free finish you'd get with a facing.


You could also cut your facing from a lighter weight fabric (Liberty Tana lawn is a perfect weight) or just choose the correct weight fabric in the first place. However, once I got past my bulky fabric woes, I had a finished dress I was really pleased with. I think it's chic, classy and grown up but still retains a vintage edge. The French darts create a surprisingly flattering shape, which is a big bonus for those of us with curves!


In summary, I like it! There are some different design techniques involved, which makes for a slightly more challenging make. I'm talking about the raglan sleeves and French darts, so not exactly rocket science, but if you're hoping to move on from a first dressmaking project and expand your skills a little, then the Francoise dress would be a good pattern to try. If you do make the Francoise dress, don't forget to enter it into the Sewing Francoise contest - you could win a £500 Janome sewing machine or one of nine £100 fabric vouchers!!! Yikes!! x

The Francoise pattern was given to me free of charge for pattern testing. All views my own.


Sunday, 17 July 2011

The Ginger Super Skirt


If you fancy a bit of stash busting and about two hour’s sewing, here's what you do - make yourself a Colette Patterns Ginger skirt.  I’ve been meaning to make one for ages but couldn’t quite decide which fabric to use.  Then I saw Lauren's fab denim version full of attitude, and my mind was made up.  I absolutely love Lauren's Lladybird blog, the clothes she makes are right up my street (lots of gingham and polka dots) and her attention to detail is second to none.  She’s also made the most beautiful dress I’ve ever seen....  Now that I’ve embarrassed the poor girl to death, I’ll move on to the Ginger skirt.


This is a great pattern for a beginner: very few pattern pieces, simple, clear instructions and, for me, anyhow, a good fit.  If you’re thinking of sewing your first garment then I’d highly recommend it.  There is an invisible zip but don’t let that put you off, just read on!

On my bottom half at least, Colette patterns are a very good fit – I cut a straight size 8 and it fitted perfectly with no adjustments.  The Ginger is a high waisted A-line skirt with a retro look about it.  For those of you who are interested, it also has a very flattering midriff as it tends to pull you in around the stomach area (always a good thing in my case).


I used a dark denim from my stash that was left over after I made my boys a beanbag. Because the denim is quite thick, I used a thinner cotton for the inner waistband facing.  Unusually for me, I went for a print type that doesn’t usually interest me.  


That was a joke, I had a light blue polka dot in my stash and couldn’t resist!

The only bit that might put a beginner off is the invisible zip.  On my dressmaking course, my tutor taught us how to insert an invisible zip using just a standard zipper foot.  The garments I’ve made using this method have all been OK, but it’s always a bit trial and error with lots of swearing.  For this make, I decided to splash out and buy myself an invisible zipper foot. Wow, what a difference, it makes things SO much easier and neater.  I can’t believe it’s taken me this long to buy one but I’m now a true convert.  The only slight nagging feeling I have is the combination of slightly wussy, weakling child invisible zip coupled with sturdy workman’s denim.  I should probably have used a more robust zip – I’ll let you know how it fares…

Sorry vintage McCall’s 7978 your reign as queen of the A-line skirt patterns is officially over.  You’ve just been usurped by the Ginger.  I’m finding it difficult to imagine a day when I WON’T be wearing this one! x

Monday, 20 June 2011

MMJ: Days 15, 16, 17 and 18

I think four days of outfits is about the maximum anybody can stomach at any one time, so this post will take me up to two days ago.

Day 15
MMJ: Day 15
Top: Me-made from a 1950's pattern
Vest: Primark
SkirtMe-made 1960's A-line skirt
Shoes: Clarks
Me-Made Category: Top, now a B, skirt B

I wish I could claim it was my own idea to wear these two me-made items together, sadly it wasn't, it was Roobeedoo's!  She was spot on though, as I love red and turquoise together, why didn't I think of it?!

Day 16
MMJ: Day 16
Top: Me-made from a 1930's pattern
Trousers: Me-made from Simplicity 3688
Shoes: Clarks
Me-Made Category: Top B, Trousers A

Still feeling in a turquoise mood, hence the top.  I did try the two turquoise items together but I looked like a nurse.


Day 17
MMJ: Day 17
Dress: Socialite dress
Belt: Anthropologie
Cardigan: Marks and Spencer
Shoes: Clarks
Me-Made Category: A

Strangely enough, I wore this dress a lot in the winter with tights and a cardigan. I was hoping to wear it in a summery way today but couldn't because a) my limbs were a similar hue to the actual dress - not a good look and b) weather conditions in the UK in June were positively wintery (!) so tights and cardigan it was.   

Day 18


Top: 1950's Blue Roses top
Trousers: Me-made from Simplicity 3688
Me-Made Category: C, never worn

...and with good reason.  Even though the fabric is gorgeous I'm really cross that I wasted it on this top as I hated wearing it and will probably never wear it again.  Reasons?  Too short, too drawstringy and the neck is still uncomfortably high.  The fabric is too pretty to cast aside though, so I think I can refashion it by lowering the neckline (again) and taking the casing out at the bottom to increase the length.  Grrr. I even look like I'm smiling through gritted teeth, which I was!

Apart from the blue rose top, these were a good few days - I do love wearing my handmade clothes.  Happy Monday. x


Friday, 27 May 2011

Another skirt from leftovers


Good morning.  This week I used up some more leftover fabric that’s been hanging around for a while.  It's lucky that I love A-line skirts, as most of my leftover pieces only seem to be A-line skirt-sized. 


I used the same vintage pattern as my last A-line made from leftovers (McCall’s 7978) and it was just as foolproof to make second time around.  The fabric was leftover from my Crepe dress which is SSOOO pretty, and I underlined it with plain white muslin.  This time I had enough to give the skirt its very own waistband - a luxury the last one sadly missed out on.  

I wanted to fiddle around with a fancy trim on the hem again, but the only trim I had in my stash that was the right colour was crossgrain ribbon. Karen from Did you Make That? first got me interested in ribbon as a skirt trimming when she added one as a facing on this skirt. Gorgeous isn’t it?   I’m definitely going to add one to the waistband of my next A-line.  For now, I just added it to the bottom hem as a contrasting touch.


Yet another one for my Me-Made-June wardrobe – hoorah.  It also feels nice and virtuous using leftover fabric and relieves me slightly (only slightly, mind you) of the guilt/horror of wasting £18 on the lining that shall remain nameless. Grrr.

I’ve got a craft show right after half term, which I’ve been working hard at getting things ready for.  Once that’s finished I’ll take another look at my Oolong….. 

Have a lovely weekend. x

Thursday, 5 May 2011

Using up your leftovers...


If you’ve been riddled with curiosity wondering what became of my leftover fabric from my 1930’s blouse, I can now put you out of your misery. I bought two metres of fabric, and as I’m relatively petite, there was just enough left to cut out my mystery item …. a 1960’s A-line skirt from this pattern.


I took a chance and didn’t make a muslin, I figured if it all went horribly wrong then this could be the muslin. After I sewed it up, I tried it on and had that rare, beautiful dressmaking moment - it was an exact, perfect fit.  The only tiny adjustment I made was to take in half an inch at the widest part of the hips when I was sewing the side seams up and that’s it.  In my experience, skirts are a lot easier than bodices to fit, but this was nothing short of miraculous. 

A pretty good fit
I underlined it with very thin off-white cotton (also from Ditto for £1.50 a metre). There wasn’t enough fabric for a waistband, so I drafted a facing from a piece of co-ordinating cotton. This sounds technical but in fact it was super easy to do and I got the method from this book – Sew What! Skirts.  As well as showing you how to draft your own skirt patterns based on your own body measurements, it’s full of really useful advice on all things skirt-related.  This is where I learnt to draft my own waistband for my Japanese pattern book skirt and that was a doddle too.  I can’t recommend it highly enough.  I liked the look of the facing so much I made some bias binding for the inside hem. Yes, nobody will see it, but I know it’s there. 

McCall’s 7978 is one of those patterns I’m sure I’ll use again and again.  Reader Nathalie has a similar 1960’s skirt pattern and at the last count had made five versions! I'll definitely be following her example as it’s such an easy pattern to sew. There's more than enough time to embellish with secret hem bindings etc, without the whole project taking weeks on end. There’s also a fabulous, thrifty sense of satisfaction in using up leftover bits of fabric to create whole new garments.  I’m now planning to make a plain red version with my leftover Swing Dress fabric and a grey floral version with my leftover Crepe dress fabric.  If they’re as easy to sew as this little number, I can sew them up in time for Me-Made-June.  Hoorah. 


LinkWithin

Related Posts Plugin for WordPress, Blogger...