




There are a couple of things I should point out.
1. I'd highly recommend making a bodice muslin before cutting into your precious fabric. This is time well spent as it will allow you to check the fit and practice the technique.
2. This tutorial shows one side of the back bodice as it was smaller and easier to photograph, but the principles are the same for both back and front pieces.
3. Don't be despondent if it isn't perfect on your first try - of the four reinforcement squares I sewed, two went in without a fight first time and two had to be unpicked and redone.
4. Take your time…and make sure you have a stiff drink poured for when you've finished!
1. I'd highly recommend making a bodice muslin before cutting into your precious fabric. This is time well spent as it will allow you to check the fit and practice the technique.
2. This tutorial shows one side of the back bodice as it was smaller and easier to photograph, but the principles are the same for both back and front pieces.
3. Don't be despondent if it isn't perfect on your first try - of the four reinforcement squares I sewed, two went in without a fight first time and two had to be unpicked and redone.
4. Take your time…and make sure you have a stiff drink poured for when you've finished!
Are you sitting comfortably? Then I'll begin!
For each underarm seam you'll need a two inch square of bias cut fabric (the same as your dress fabric).
On the RIGHT side of the fabric, mark the stitching line as shown.


Centre the bias square over the tip of the stitching line and pin in place. Now mark the stitching lines on your bias square so they join up with the original ones.

Sew along the stitching line on the square and slash up to the tip.

Press the bias square first to one side of the stitching, then the other and fold it through to the WRONG side of the bodice.

This step is not at all clear in the instructions, but believe me, that square needs to be hidden on the WRONG side! It's a bit tricky to get it to turn through neatly but it will. I'd recommend using a press cloth at this stage.
This is how it should look when it's all pressed through to the wrong side.
This is how it should look when it's all pressed through to the wrong side.

And from the right side.


Your two back bodice pieces should now be stay stitched at this point as shown in the diagram below. Hmmm, guess who forgot to stay stitch her pieces for this tutorial?! Don't you forget please - as well as preventing the edges of the pattern pieces from stretching, the stay stitching will provide a stitching line for later on.
 |
| Yes, those bias squares should not be shown flapping about on the right side of the bodice, grrrr |
You're now going to pin the bodice side back to the bodice back at the side and armhole edges, right sides together. Just imagine a nice line of stay stitching underneath those pins!

What I should have done at this stage is baste the pieces in place and I'd recommend you do too, it will save lots of heartache further down the line! I also found a good tip for this step on A Stitching Odyssey. Marie slits the top of the side back piece up to the seam allowance (or up to the stay stitching in your case), enabling the pieces to manoeuvre into position more easily.
 |
| See the slit, at the top of the black piece? |
Now, take a deep breath and stitch into position, sewing just outside the line of stay stitching to keep it hidden. Remember:
1. Don't feel you have to sew the whole section in one go. If you sew one seam at a time it will give you more control and hopefully minimise unruly fabric getting caught in your stitching. Talking of which…
2. You're sewing round a very sharp corner so you need to be aware of folds of fabric potentially getting in your way. Go slowly and keep re-positioning your fabric out of the way of your needle.
Here are the pieces stitched together. In an ideal world, the top of the side back piece would have been slashed down to where the stitching begins.

Press seams open and clip into your curves where necessary.
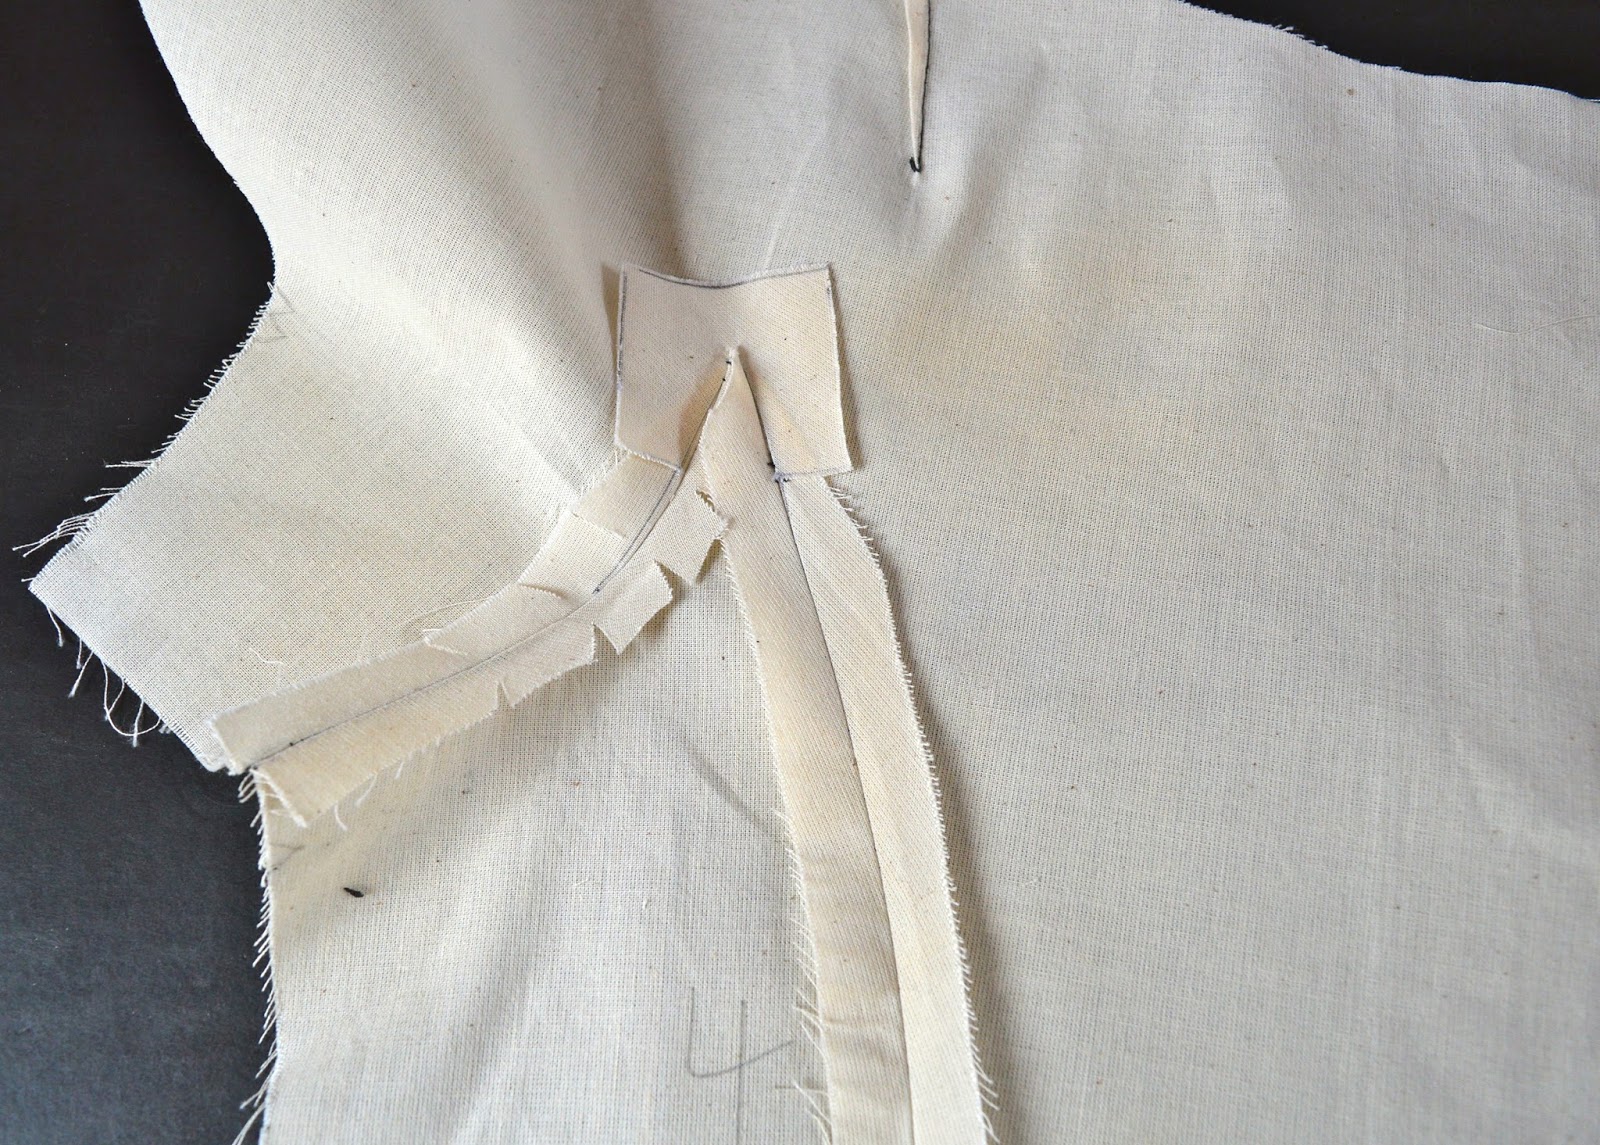
This is how it should look from the right side.

And here's the same seam on the finished dress. The reinforcement square is completely hidden and will add strength to the inner corner of the seam line.
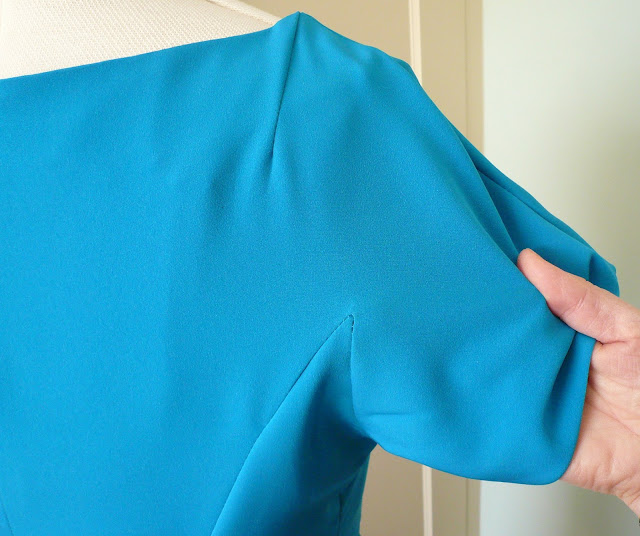
If you're at all worried about the neatness of your underarm seams it may help to use a busy, patterned fabric. Nobody will ever notice the odd wonky stitch!
I hope this tutorial provides a bit of extra guidance if you're tackling this pattern. And as always, if there's anything you don't understand or that doesn't make sense, please let me know in the comments. Have a good weekend! x
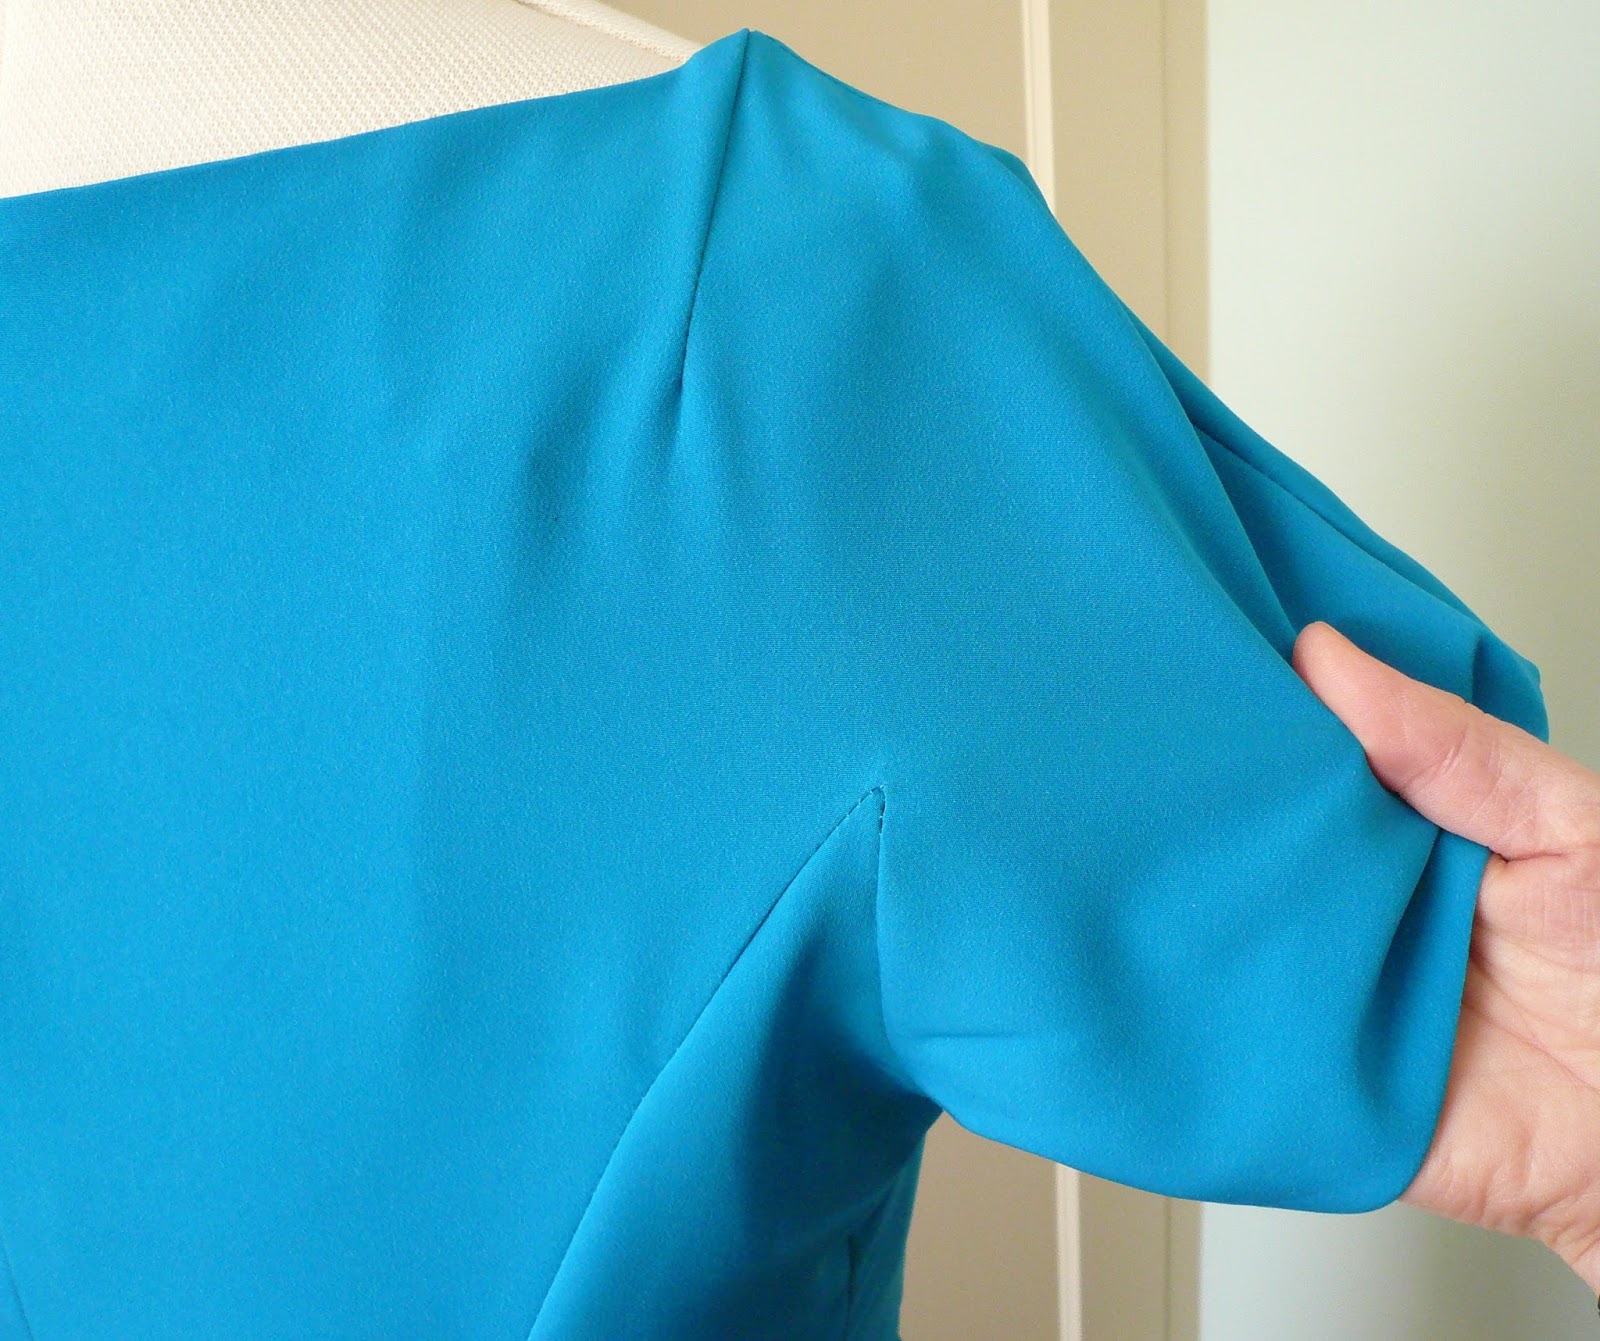
If you're at all worried about the neatness of your underarm seams it may help to use a busy, patterned fabric. Nobody will ever notice the odd wonky stitch!
I hope this tutorial provides a bit of extra guidance if you're tackling this pattern. And as always, if there's anything you don't understand or that doesn't make sense, please let me know in the comments. Have a good weekend! x


