


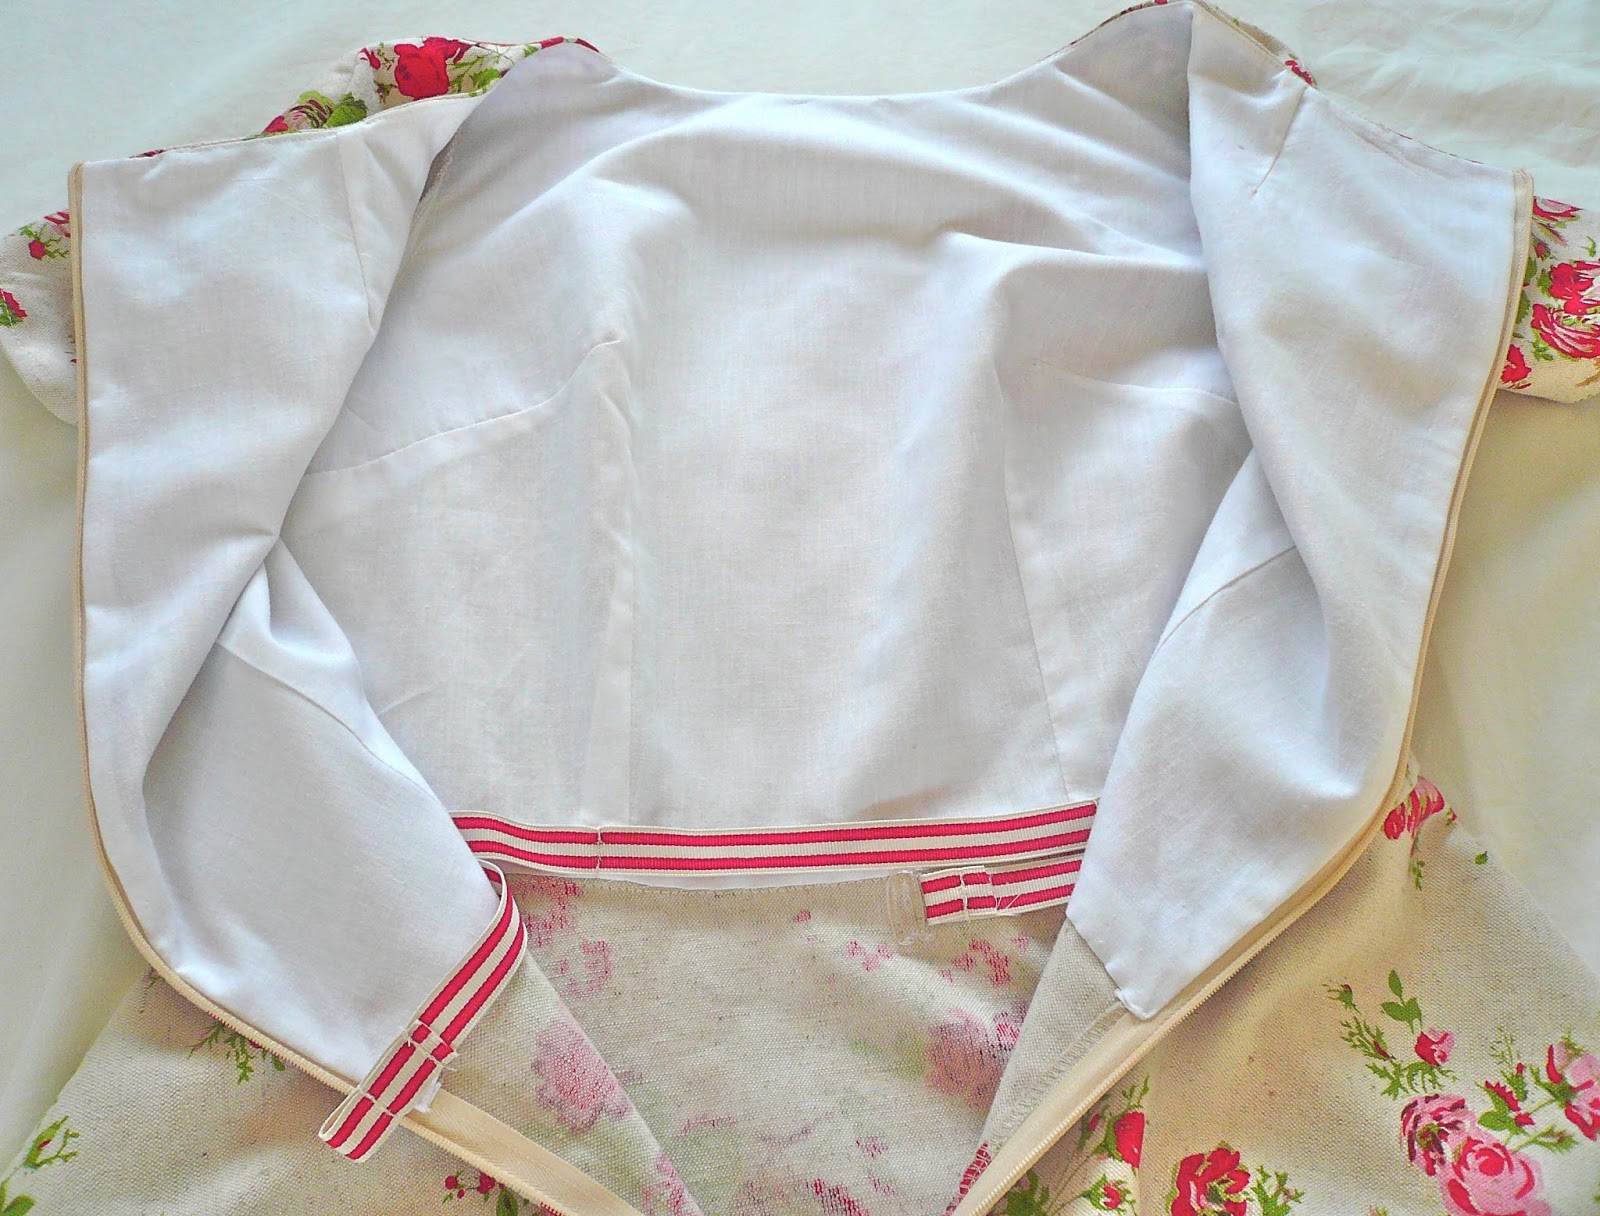
After a fair bit of research, I came to the conclusion that there are two methods for attaching a waist stay to a dress. The first way is to machine stitch the ribbon or stay to the waistband seam which supports the weight of a full skirt (see the Sewaholic tutorial for this method). The second way is to tack it to the lining (or seams if your dress is unlined) at regular intervals, which is the method described on the Gorgeous Fabrics blog. I've taken elements from each one to make it work for my particular garment, but would like to give both tutorials the credit they deserve for showing me how it's done!
I chose to use the second method of tacking the waist stay to the seams of the dress. This seems like the easiest method for the Emery dress as the bodice is fully lined. It's simple to make too, barely taking me half an hour from start to finish.
You will need
A length of grosgrain or Petersham ribbon ⅝"to 1"wide, whatever width is most comfortable for you. I can't remember where my ribbon came from (probably to tie up a fabric purchase) but happily, it's the exact colours of my dress.
The ribbon should measure the exact length of your waist plus at least 6" for fiddling about with.

A set of waistband hooks and eyes. My preference was the kind of hook used on a bra or swimsuit.

1. Fold your ribbon in half and mark it with a pin. Pin this to the centre of the waistline on your dress, (usually equidistant between the front bodice darts if you have them.)

2. Continue pinning the ribbon to the waistline seams and darts. Pin it to the zip openings as well, just to hold it in place.

3. Now hand tack the ribbon to the seams/darts, backstitching a few times for security. I attached mine to both front and back darts for extra anchorage. Don't tack it to the zip as you need the few inches around the opening to float free.

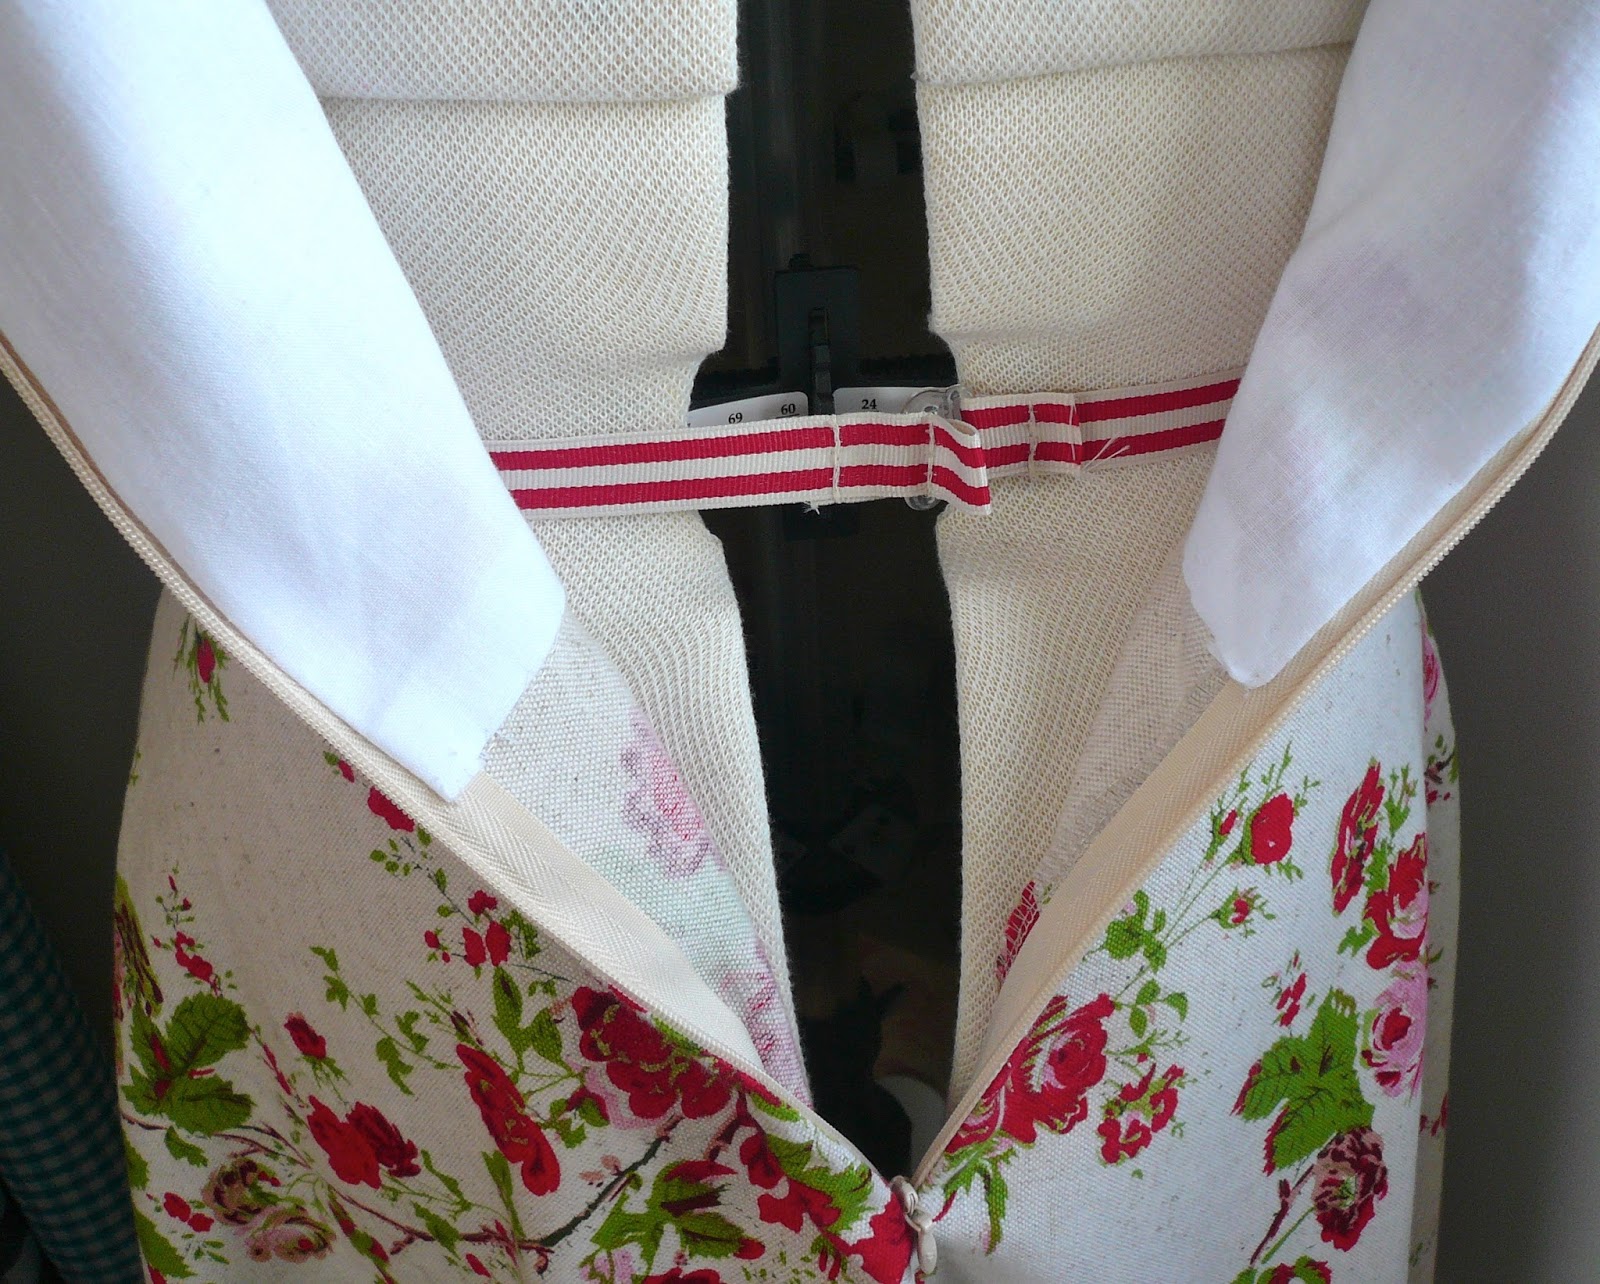
4. Make a loop at one end of the grosgrain ribbon, thread your hook through and pin.

5. At the other end, make a loop with your ribbon and pin.

6. You now need to try the dress on and adjust the pins so that the waist stay fits securely around your waist. I used Tasia's recommendation of trying the dress on back to front - it works!
7. If, like me, you find you have a very different waist measurement pre- and post-lunch, then you may wish to add an extra hook/row of stitches for this eventuality. This genius idea came from Claire at Sew, Incidentally (is there anything that woman doesn't know?!) Simply add add two rows of stitches instead of one: the one furthest away from the end is for your actual waist measurement and the one nearer the end is the looser fitting one to accommodate your stomach after lunch. Here's Claire's diagram which explains it perfectly.

As a dedicated eater of pies, I went for the two loop option. You may need to fiddle with your pins to get them in the right positions, just make sure that your actual waist measurement is the pin furthest from the end.
8. The final stage is to simply stitch where your pins where to create the loops for hooking. Make sure you backstitch a few times to keep them secure.

And there you have it, a waist stay! Now you can go dancing, eat pies, or do both at once and your dress will stay securely anchored at the waist.
 |
| Angie modelling the waist stay on the Emery dress |
I hope you found this tutorial helpful and as always, please let me know if there's anything that isn't clear. x
Very well described. I wanted to add one to a recent dress, but wasn't't sure how to add it. You've convinced be it can be done easily.
ReplyDeleteI also love your fabric. I had a skirt in a similar fabric. I loved it.
thats great - I had always wondered what to use, and I love the two pie adjustment!
ReplyDeletereally great tutorial - thanks! i love the big dinner adjustment!
ReplyDeleteHaha, I'd never come across these before, until I saw the pretty stripes in your Emery and thought it was just neat finishing-off. It seems like a good idea; might have to give it a try - is a waist stay more useful on thinner fabrics?
ReplyDeleteYour timing is perfect! I am in the middle of making a prom dress and this waist stay method will be what I use to make a waist stay for a princess seam, dropped waist tulle-skirted concoction. Very clear info, thank you!
ReplyDeleteThis is really helpful! Thanks!
ReplyDeleteAwesome, thanks for the tute! Bookmarked for when I will add a waist stay.
ReplyDeleteGreat tutorial Jane! I am a big fan of waist stays, particularly with formal wear. When I made it for my wedding dress, I tacked it to the corselette ( you could call it lining, as it's the most inner layer of the dress) on the outside (i.e. sandwiched between layers) for the majority of the way, and took it out at the side back seams (it's a princess lined dress). This way it is a lot more comfortable -- I didn't enjoy having grosgrain ribbon against my skin. Alternatively, I know that some people prefer taking the waist stay back out through 2 button holes, rather than at the seams. I thought I'd share just in case there are others out there that find it uncomfortable. Oh also, I've used bra enclosures before, so a few rows of hook and eyes ready made for you for adjusting the width for added comfort.
ReplyDeleteThank you so much Alice, both these tips are excellent! x
DeleteJane, thank you so much for taking the time to post this tutorial. It will definitely come in handy when I make his dress (or any other for that matter!).
ReplyDeleteVery much. appreciated. Sassy Sewing Bees https://facebook.com/sassysewingbees ❀
ReplyDeleteThis is really helpful - thanks for the tutorial Jane!
ReplyDeleteGreat tutorial Jane - thank you for sharing it!
ReplyDeleteSaw this on Pinterest. Always wanted to know how, but can we see the full dress? That fabric is wonderful!
ReplyDeleteThis is so useful. I always see these in patterns but have never got around to trying it out myself. At least I know for the next time I make a dress.
ReplyDeletehttps://sewmodiste.wordpress.com
This tutorial is really helpful, nice pictures and great description. Thanks for it...
ReplyDeleteI know it's over a year later but thank you for this tutorial!! It was so helpful and wouldn't you know, it WORKED! I was nervous about my abilities but an otherwise unwearable dress made wearable due to such a simple little trick. :)
ReplyDeleteAh that's so wonderful to hear, thank you! By far the best part of writing and posting tutorials is getting comments saying "it worked!" So glad it did! x
Delete