Tuesday 25 September 2012

Peaceful cooing Alma blouse


I've been wanting to try out the Sewaholic Alma blouse for a while, in particular, view B with its lovely Peter Pan collar.  I liked the idea of playing around with a border print, to see if I could create a contrast collar using different areas of the fabric. My fabric of choice was Peaceful Cooing in grey from M is for Make - the most beautiful double gauze border print fabric with a repeat pattern that gradually gets larger as it gets closer to the border. Idiot that I am, it was only once I started cutting the fabric that I realised the pattern was actually little white doves. Duh, the clue's in the name, Peaceful Cooing! I thought they were a mixture of cotton wool and flowers. Ahem.


Anyway, this was my first attempt at working with a border print and after lots of draping myself in front of the mirror, I decided that the smaller pattern would make up the main area of the blouse and sleeves, with the larger border print finishing at the hem and repeated in the collar. I must admit, I really like the result. Border prints often run in the opposite direction to the selvedge, which means you have to cut the fabric against the grain. You probably end up needing more fabric than usual, but for something special I think it's worth it. The fabric is already double thickness, so I didn't bother with interfacing the collar and facings. This worked well, giving a bit of structure to the collar but still retaining a nice drape.

The only change I made to the pattern was the length of the sleeves. It's a fact that my arms are ridiculously short (I'm talking T-Rex short!), and the three quarter length sleeves really didn't do me any favours. I also felt like they made the blouse look a bit like an artist's smock, which is all very well if that's what you're after, but I wasn't. I shortened them by about five inches which now makes them far more cardigan friendly in the colder weather, always a bonus! 


The pattern was absolutely perfect. In theory, I should steer clear of Sewaholic patterns - they're designed for pear-shaped women and I'm the complete opposite. However, they're so well drafted and designed, that I still managed to get a good fit just by gradually grading sizes at the bust, waist and hips. The measurements changed but the overall shape and design of the pattern remained, which I found very impressive. I cut a size 10 at the bust, grading down to an 8 at the waist, and a 4 at the hips as I wanted the blouse to be quite fitted. I'm thrilled with the result and can see this being worn a lot. I was worried that the border print would get lost if it was tucked in, but you can still see it, even when it's tucked into a Ginger skirt. 


The only thing I didn't like about making this blouse was inserting the invisible side zip. They're right up there with hooks and eyes as my sewing arch enemies. I'm pondering whether to make my next one in a knit fabric, which will eliminate the need for a zip?  Or a long, central back zip instead? What do you think? One thing's for sure, there will definitely be more than one version of this blouse in my wardrobe before the year is out. x

Saturday 22 September 2012

GeoCentric Bag

When Annie from The Village Haberdashery first featured the GeoCentric fabric range on her blog, I commented that the cotton canvas base cloth looked perfect for bag making. When the fabric arrived in her shop, she contacted me and asked if I'd be interested in testing out its bag making potential. Yes please!  A few days later, this arrived: half a metre of a large scale herringbone pattern in a vibrant orange. 

Zigzag in coral
I paired it with a dusty blue lining cotton to make a shopper-style bag. The pattern is from an old copy of Sew Hip and is a straightforward, no nonsense pattern for a lined bag. I've adapted it over time and fiddled with the dimensions, but it's basically the same pattern I use to make the larger bags I sell at my craft fairs. 


I don't make many bags of this size, not because they're tricky to make, but because of the amount of fabric involved. They require half a metre of outer fabric, half a metre of lining fabric and usually some kind of canvas interfacing to go between the two layers to give the bag a bit of structure. This all adds up, so they're not actually very cost effective, but they're quietly popular and I generally sell two or three per fair.


One thing I wanted to test was how the weight of the Geocentric fabric fared. It was sturdy enough to hold its own with just the lining fabric, and I didn't need to add interfacing, which is a big bonus. It's similar in weight to the decor weight fabric you sometimes find in Ikea, so perfect for bags of all descriptions, as well as aprons and cushion covers.  

As a next project, I'd like to use these fabrics for iPad covers, coupled with a cotton lining fabric and some kind of fleece interfacing. They're a good weight (you don't want anything too flimsy when it comes to protecting your precious iPad) and the pattern designs are classic. I'll let you know how I get on with that idea. In the meantime, I just have to choose from the delectable colours and patterns on offer. 

Circles in Turquoise

Tridents in Daffodil

Have a good weekend. x

Fabric for this project was provided free of charge by The Village Haberdashery. All views my own.

Sunday 16 September 2012

Finished: Abbey Coat


Yippee!  My Abbey coat is finished in perfect time for the start of autumn and I'm just delighted with the final result, even if I say so myself.
Delighted!
I made view B from Jamie Christina's Abbey Coat pattern (without flounce). Jamie Christina has a straight forward, clear way of explaining steps in a pattern that really appeals to me.  There are plenty of explanatory diagrams and at the end of the process I felt like I understood the mechanics of making a coat.  The pattern doesn't contain any specific tailoring techniques, but is an excellent base from which to add your own if you're feeling brave. The only additional technique I used was to make bound buttonholes. 

Perhaps it's another lucky fluke but the cut of this coat just happens to be a perfect match for my shape. I cut out a size 10 and didn't make one single change to the pattern. There isn't one measurement on this coat that doesn't fit me perfectly. Yes, I'm sure some of it is luck, but I also think it's a very well cut and designed pattern. Can you tell I love it yet?!

As a side note, I'm quite aware that with the shorter, jacket style, this coat looks very similar to my first attempt at a jacket from last year. The similarities are only skin deep though - the Abbey coat is a much more superior coat in so many different ways. For starters, I worked from a proper coat pattern this time, rather than trying to teach myself from a book, and this made a world of difference. The book I originally used - Built by Wendy Coats and Jackets - is a useful guide, but you do flounder in the dark a bit by comparison. For instance for last year's attempt, the lining was cut from the same pattern pieces as the jacket. There was no extra ease built in for stretching and actually getting the thing on and off. Consequently, the couple of times I wore it, it rode up at the back, making me look like a hunchback. This time round, there was a pleat built into the back lining piece and one along the bottom edge to allow for wearing ease. It makes all the difference!

Admire my lining
As for the construction, it started swimmingly then went a bit downhill towards the end. I did all the boring, preparation work over the summer: making a muslin, cutting out the coat and lining pieces, interfacing everything, overlocking the lining pieces and making the bound buttonholes. Because of this, the bare bones of the coat only actually took me about a day to sew together. A couple of the final stages were VERY time consuming though - such as opening up the back of the bound buttonholes. I found it a much more nerve wracking stage than actually making the buttonholes, and even with reading glasses on, I found it very difficult to see what I was doing. The final straw was when I realised I'd completely buggered up on the maths when measuring my buttonholes, which meant my chosen buttons wouldn't fit...gah! After a deep breath I simply found some teal coloured vintage buttons from my stash that did fit the buttonholes. It's no biggy, but it was disappointing not being able to use the coat buttons I'd bought especially.  


I made two other changes to the pattern/construction. The binding on the cuffs is supposed to be made from your coat fabric. Because of the thickness of the wool, there was no way that was ever going to happen, so I used some vintage binding from my stash instead. It was still a fiddle attaching it, which you need to be prepared for if you're using the pattern. The pattern also calls for two buttonholes on each cuff. I was too lazy to make bound buttonholes and as the cuffs are very thick, it would have been nigh on impossible to make machine buttonholes either. My way, which is the 'Handmade Jane lazy arse way', was to sew the buttons through all thicknesses.  Happily the cuffs are quite generous, which means I can get my hands through the arms easily. 
  

One final piece of advice I would offer if you're thinking of making this coat, or indeed any coat, is to choose your coat fabric carefully. I fell in love with my thick wool, but it does add a lot of bulk to seams and makes it difficult to get them perfectly flat. I probably spent as long at the ironing board, trying to steam the living hell out of my seams as I did at the sewing machine. In the end I took it to the dry cleaners in desperation. One professional press later and my seams were flatter than I could ever have got them. Probably the best £3.50 I've spent in my dressmaking life!  

Isn't the collar the prettiest shape?
Making a coat takes a lot out of you, both in time and energy. The whole process seemed to take over my life for a while, and I'll be honest, I did feel a bit of an emotional wreck by the end of it.  But it's my pride and joy and I'm going to love wearing it this autumn.  I must give a special thank you to Karen from Did you Make That? for shining a light onto the murky area of bound buttonholes. Without her and her excellent tutoring, there woud be no buttonholes on this coat, bound or otherwise!

In other news, I had the pleasure of being part of Scruffy Badger's knicker-making gang in Bath yesterday. You can read a fine account of it on Winnie's blog here. I do have some pictures to show you, but they've had to take second fiddle to my Abbey coat for now. I WILL show you my knickers in my next post though. I promise! x


Tuesday 11 September 2012

Baby blanket tutorial

Babies are definitely flavour of the month at the moment. More than a few sewing bloggers are pregnant, as well as several people in various parts of my life. So I've been pretty busy making baby gifts.


My foolproof gift for a new baby is a lightweight fleece blanket, with printed cotton on one side and cosy fleece on the reverse.  I made one for my son's teacher last year when she was expecting and it went down very well. I've made two more since then and I can't tell you how delighted I was to see one of the newborn babes (baby Florence) wrapped in my blanket in the announcement photo.
Baby Florence's blanket
So I thought I'd put together a quick tutorial (although they're so simple to make they barely warrant the term tutorial!) They're basically a giant version of my lavender bags....

You will need:-

I x piece of 100% cotton fabric, approx 80cm wide x 105cm long (this will give you a blanket that's roughly the same size as a shop bought pram blanket)
1 x piece of fleece fabric cut to the same measurements.


1. Pin the two piece of fabric right sides together. It's worth taking the time to make sure the two pieces of fabric are pinned as smoothly as possible, as the bottom layer of fabric is liable to shift a tiny bit as you sew it.  

2. Starting about halfway along one of the shorter edges, sew all the way around each side, stopping about 10cm from where you started from. 

3. Trim the corners diagonally and trim the seam allowances back if they're quite generous.Turn the blanket the right way round through the 10cm gap you've just left.


4.  Stick the end of a paintbrush or similar into the corners to make sure they're nice and pointy. 

5. Press, making sure the seam allowance in the turning section is pressed under too.

6. Top stitch all the way around the edge of the blanket, including the gap you left for turning.

7. If you want to add a label, position it in a loop half way across the gap and stitch it in place as you top stitch across the gap (see picture above). 

8. One final press and you're done!


I must give credit where credit is due. It was seeing Laura's super cute version that first gave me the idea of making a baby blanket. Mine is a very simple, basic version, but you could add a blanket-stitched initial to personalise it as Laura did, or an appliqued initial and bound edges for a more professional look, as Kerry did recently.  The possibilities are endless, but hopefully this tutorial will prove to be a useful first step to anybody looking for an easy make for a new baby. Happy sewing!

The fabrics featured in this tutorial are available from the following:
Cream fleece fabric from this eBay seller
Blue helicopter fabric from Frumble Fabric
Flowery fabric used for baby Florence's blanket from Fabric Rehab

Thursday 6 September 2012

Guess what I've made?

Both my boys are back at school today and I can now sew in peace! Even though I'll miss my little dudes, I can't tell you how pleased I am to be back at the sewing machine. I've had a productive morning so far...

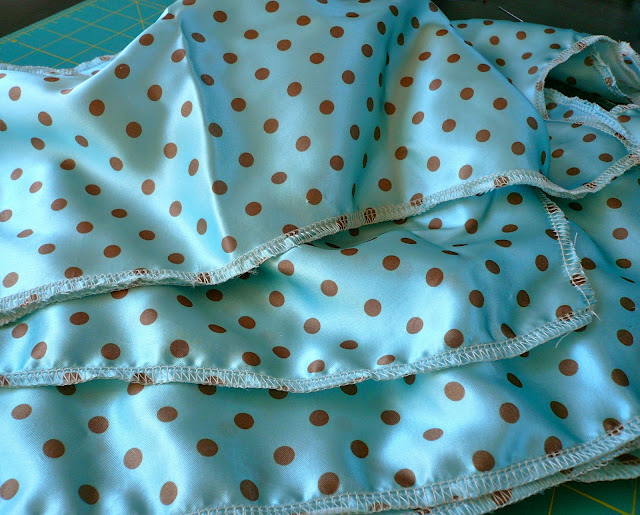
I've overlocked all the edges on my lining fabric, ready for my Abbey coat. I wasn't sure of the sewing etiquette for finishing edges on fabric that will be enclosed, so I've made up my own rules : 

If the fabric frays whilst you're handling it, then it's probably sensible to finish the edges.  
If the fabric behaves itself and doesn't seem to fray much, then leave it. 

My wool is perfectly behaved so I've left it alone, my lining fabric, although not as badly behaved as some I could mention, still frays and sheds fibres everywhere, so all edges were overlocked to within an inch of their life.

What else have I been up to this morning? Oh yes, (she said casually), I made five bound buttonholes..... 
The light was playing tricks today, the actual colour is more green than blue
YES!!! I finally made them and they're lovely. I did all the fiddly work (making the welts, thread tracing the button placements etc) last week, in between wrestling and playing football, so today's task wasn't too arduous. Still, it's probably the most pleasing morning's work I've done in a long time.


And just as my day couldn't possible get any better, look what arrived through my letterbox this morning.


Happy Thursday everybody. x


LinkWithin

Related Posts Plugin for WordPress, Blogger...